Wood Surface Security Camera Installation Guide
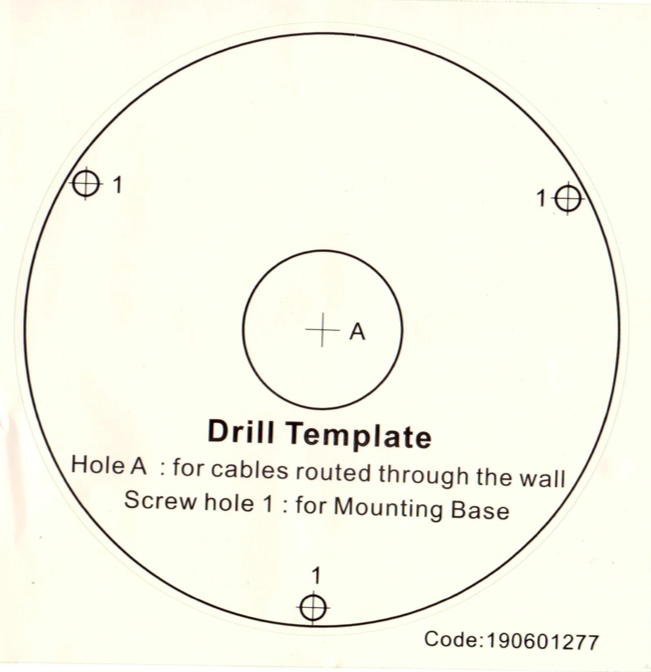
Step 1: Apply Security Camera Mount Template
Using the adhesive template supplied with your camera or mounting box apply template to the mounting surface. The adhesive template is shipped with every camera. If you lose the adhesive template, one can be downloaded by navigating to our IP Camera page and clicking on your camera model. From the camera product page, click the link for the template on the "Downloads" tab.
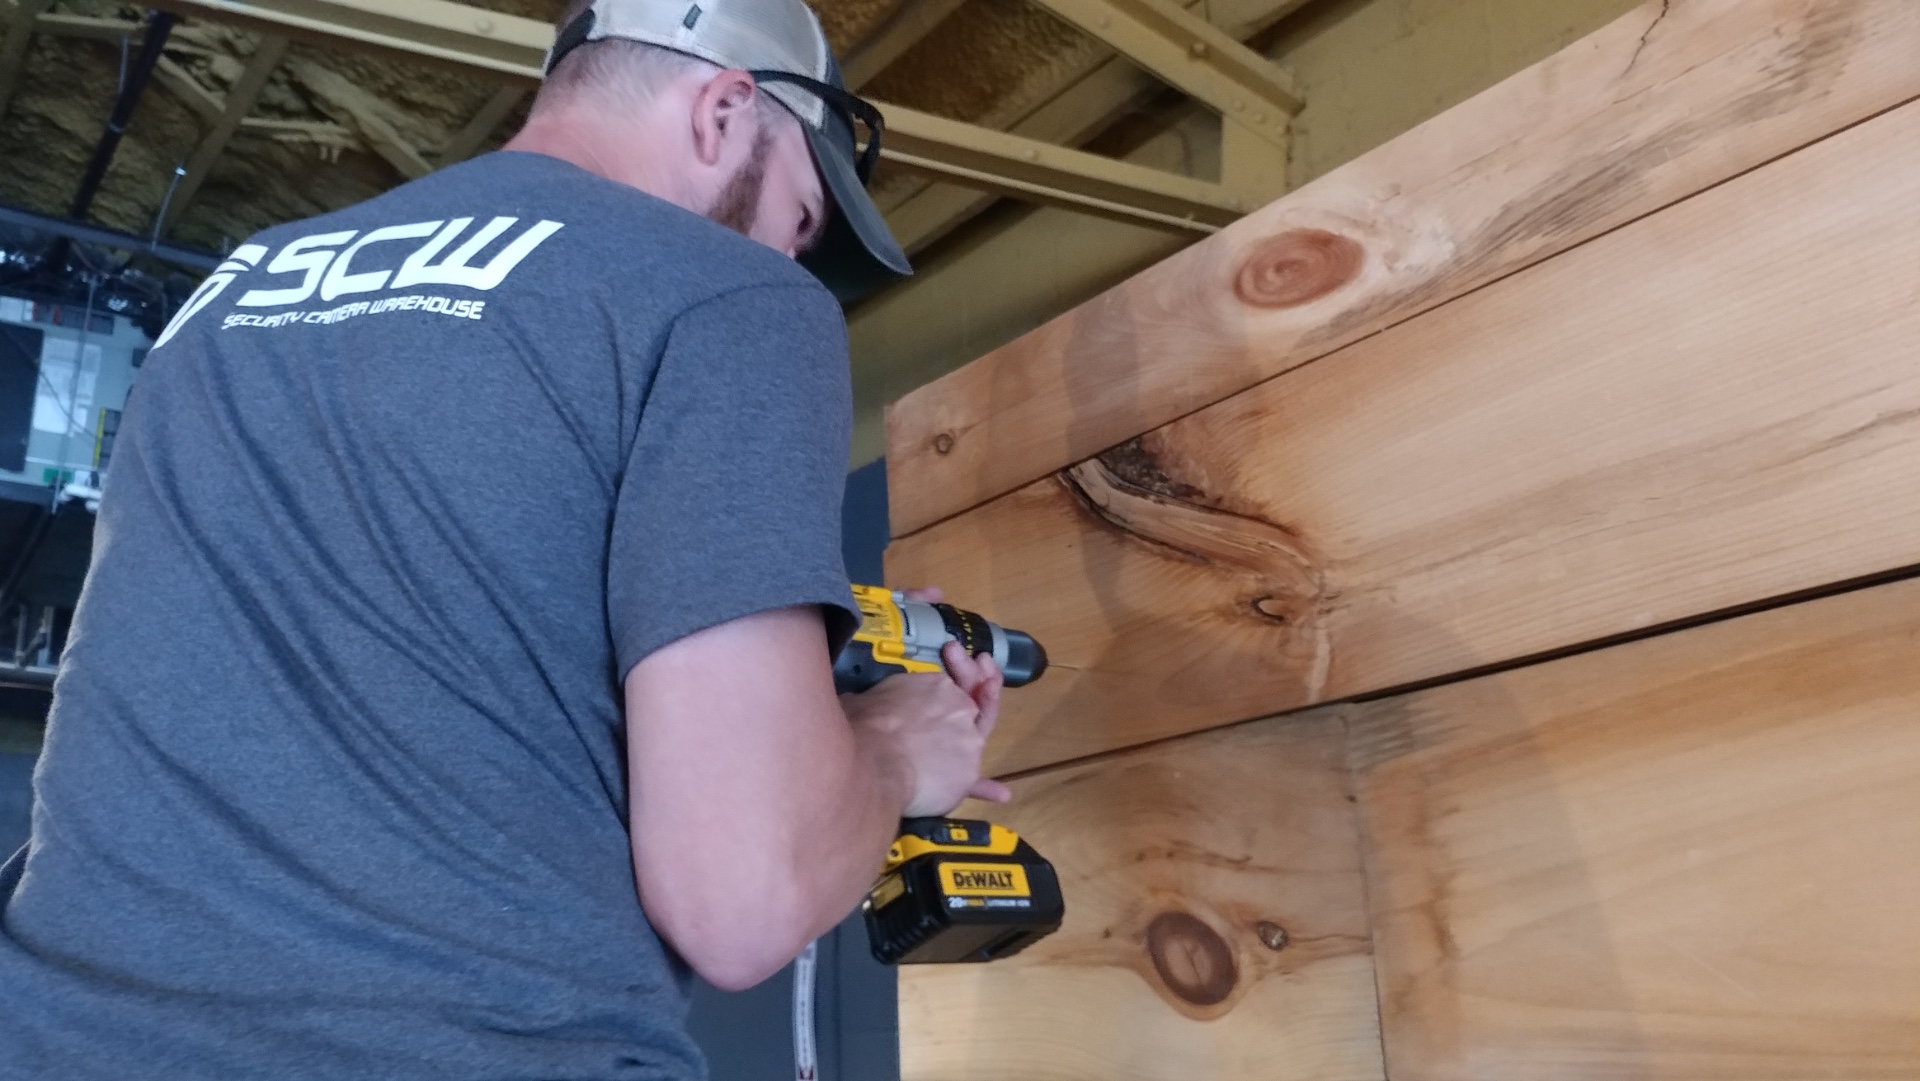
Step 2: Drill the Pilot Holes in Wood for the Security Camera Mounting Screws
Using a drill and a 5/64 drill bit; drill pilot holes in each location marked on the mounting template.
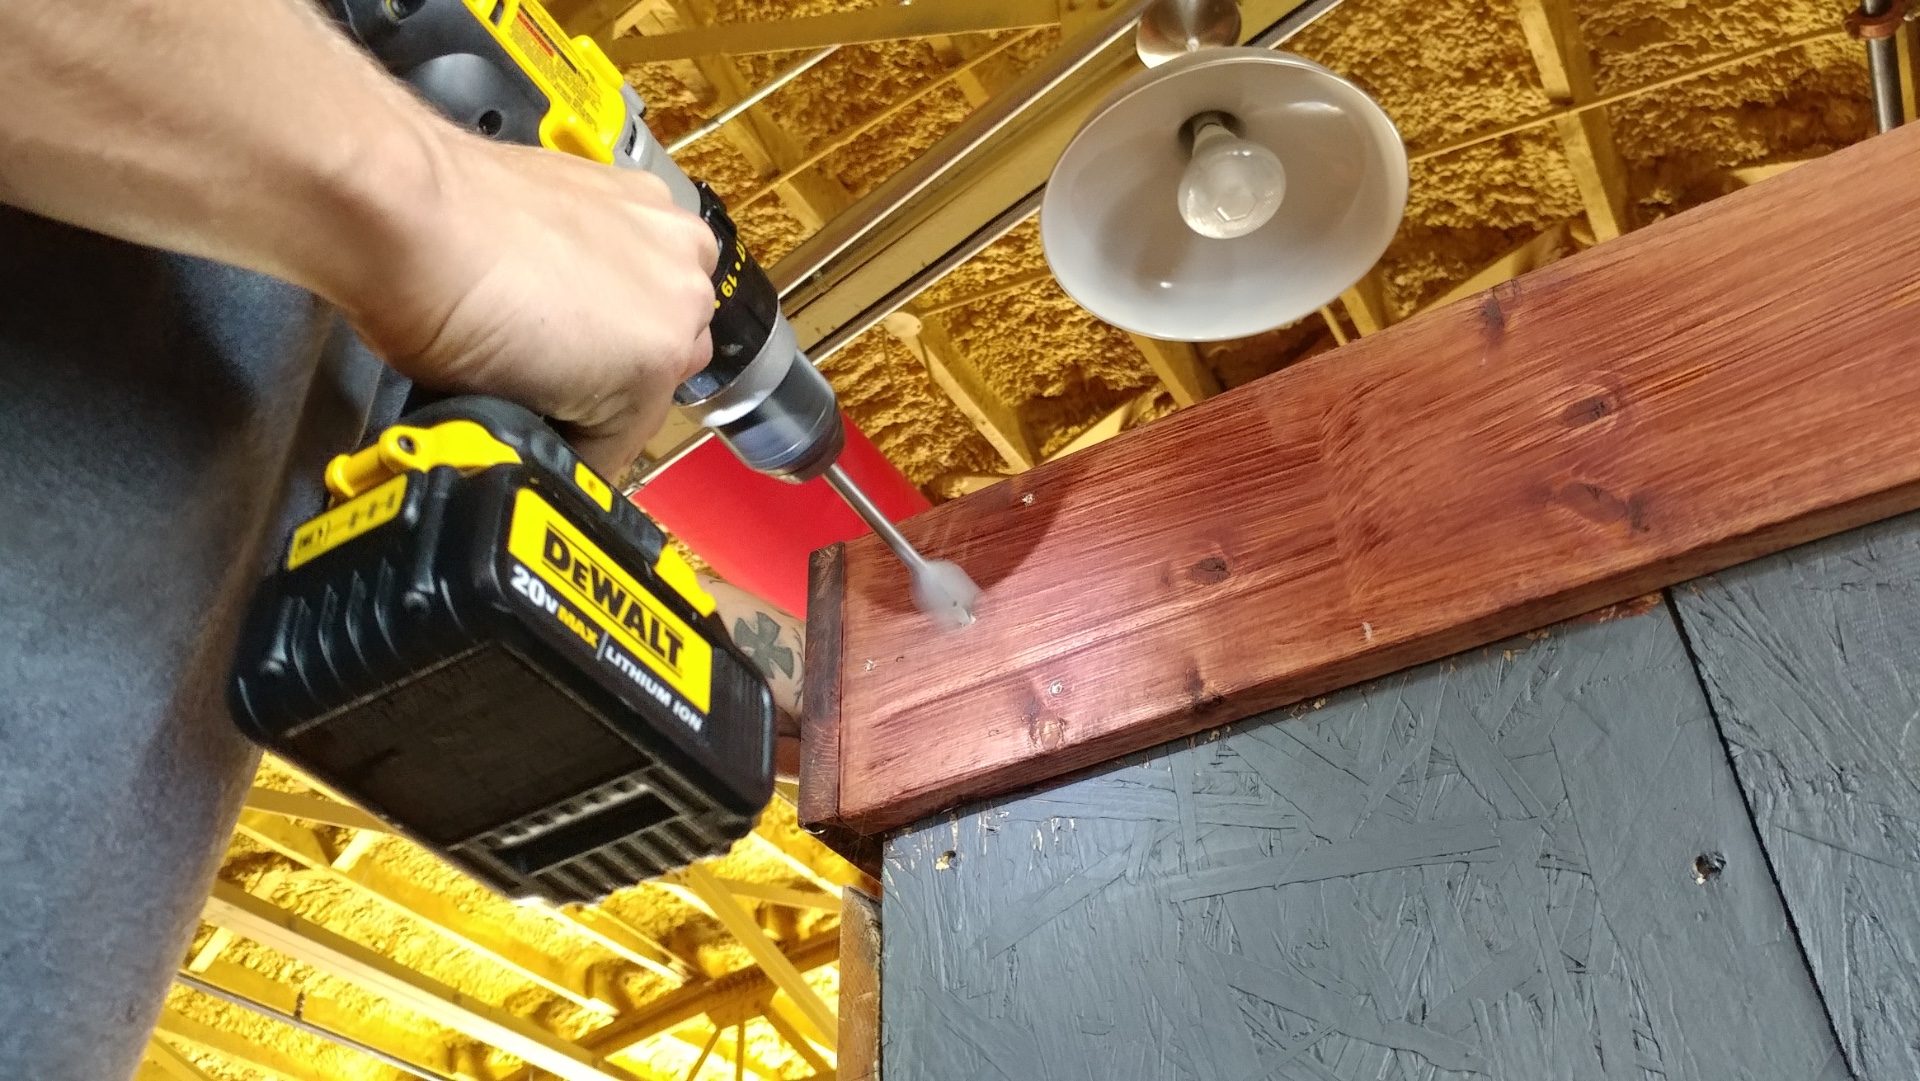
Step 3: Drill Security Camera Cable Hole in Wood
If you are running the cable through the wall drill a hole large enough for the ethernet cable, a 1/2in to 1in drill bit should be sufficient. The location of the hole is marked on the center of the mounting template.
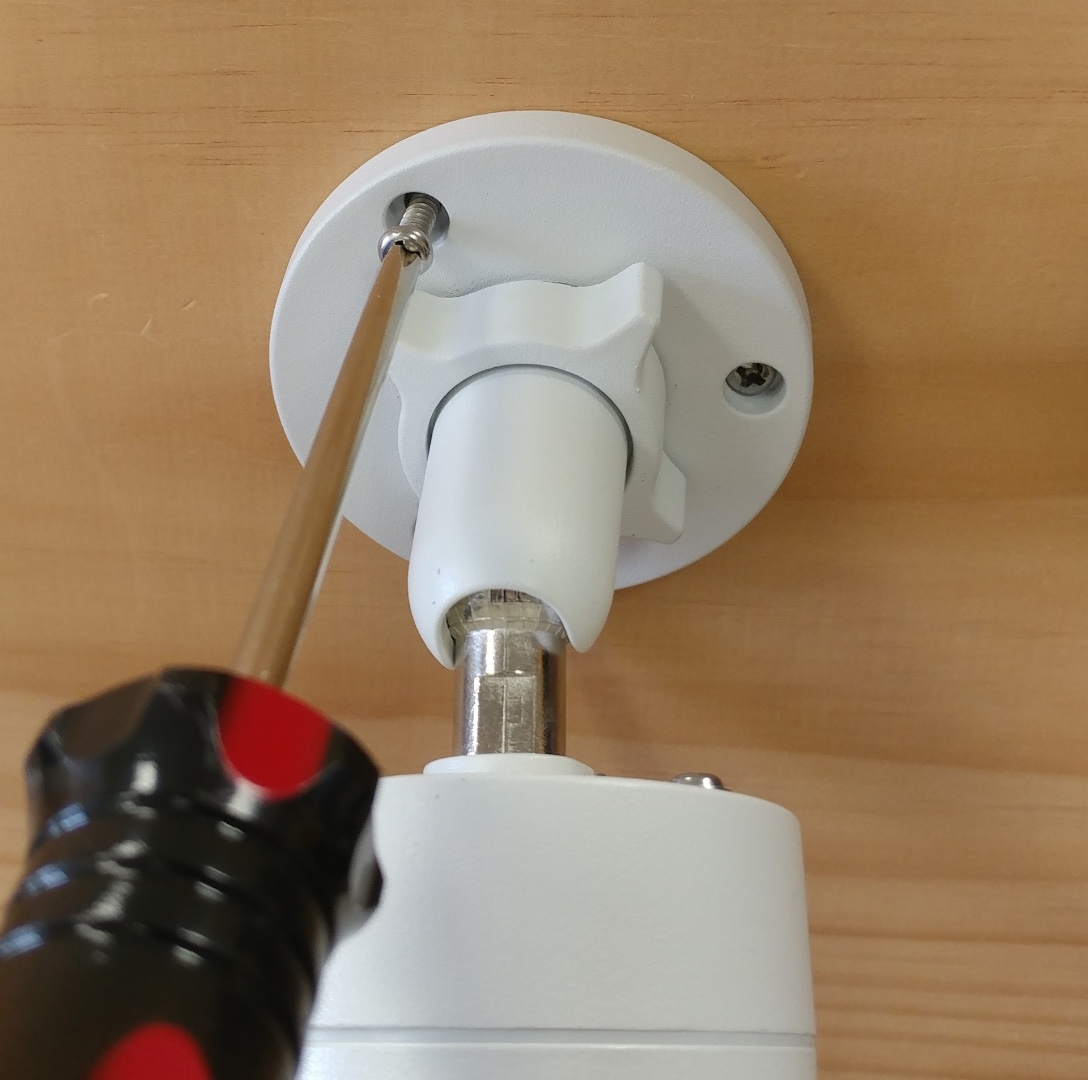
Step 4: Mount Security Camera or Camera Base Plate on Wood Wall
Using the supplied wood screws attach the camera or camera bracket to the wall. Use hand tools to prevent from stripping the mounting points.
In the first example, we are installing a turret dome security camera that has a removable camera base that functions like a bracket.

In this second example, we are installing a bullet camera which does not have a removable wall plate.
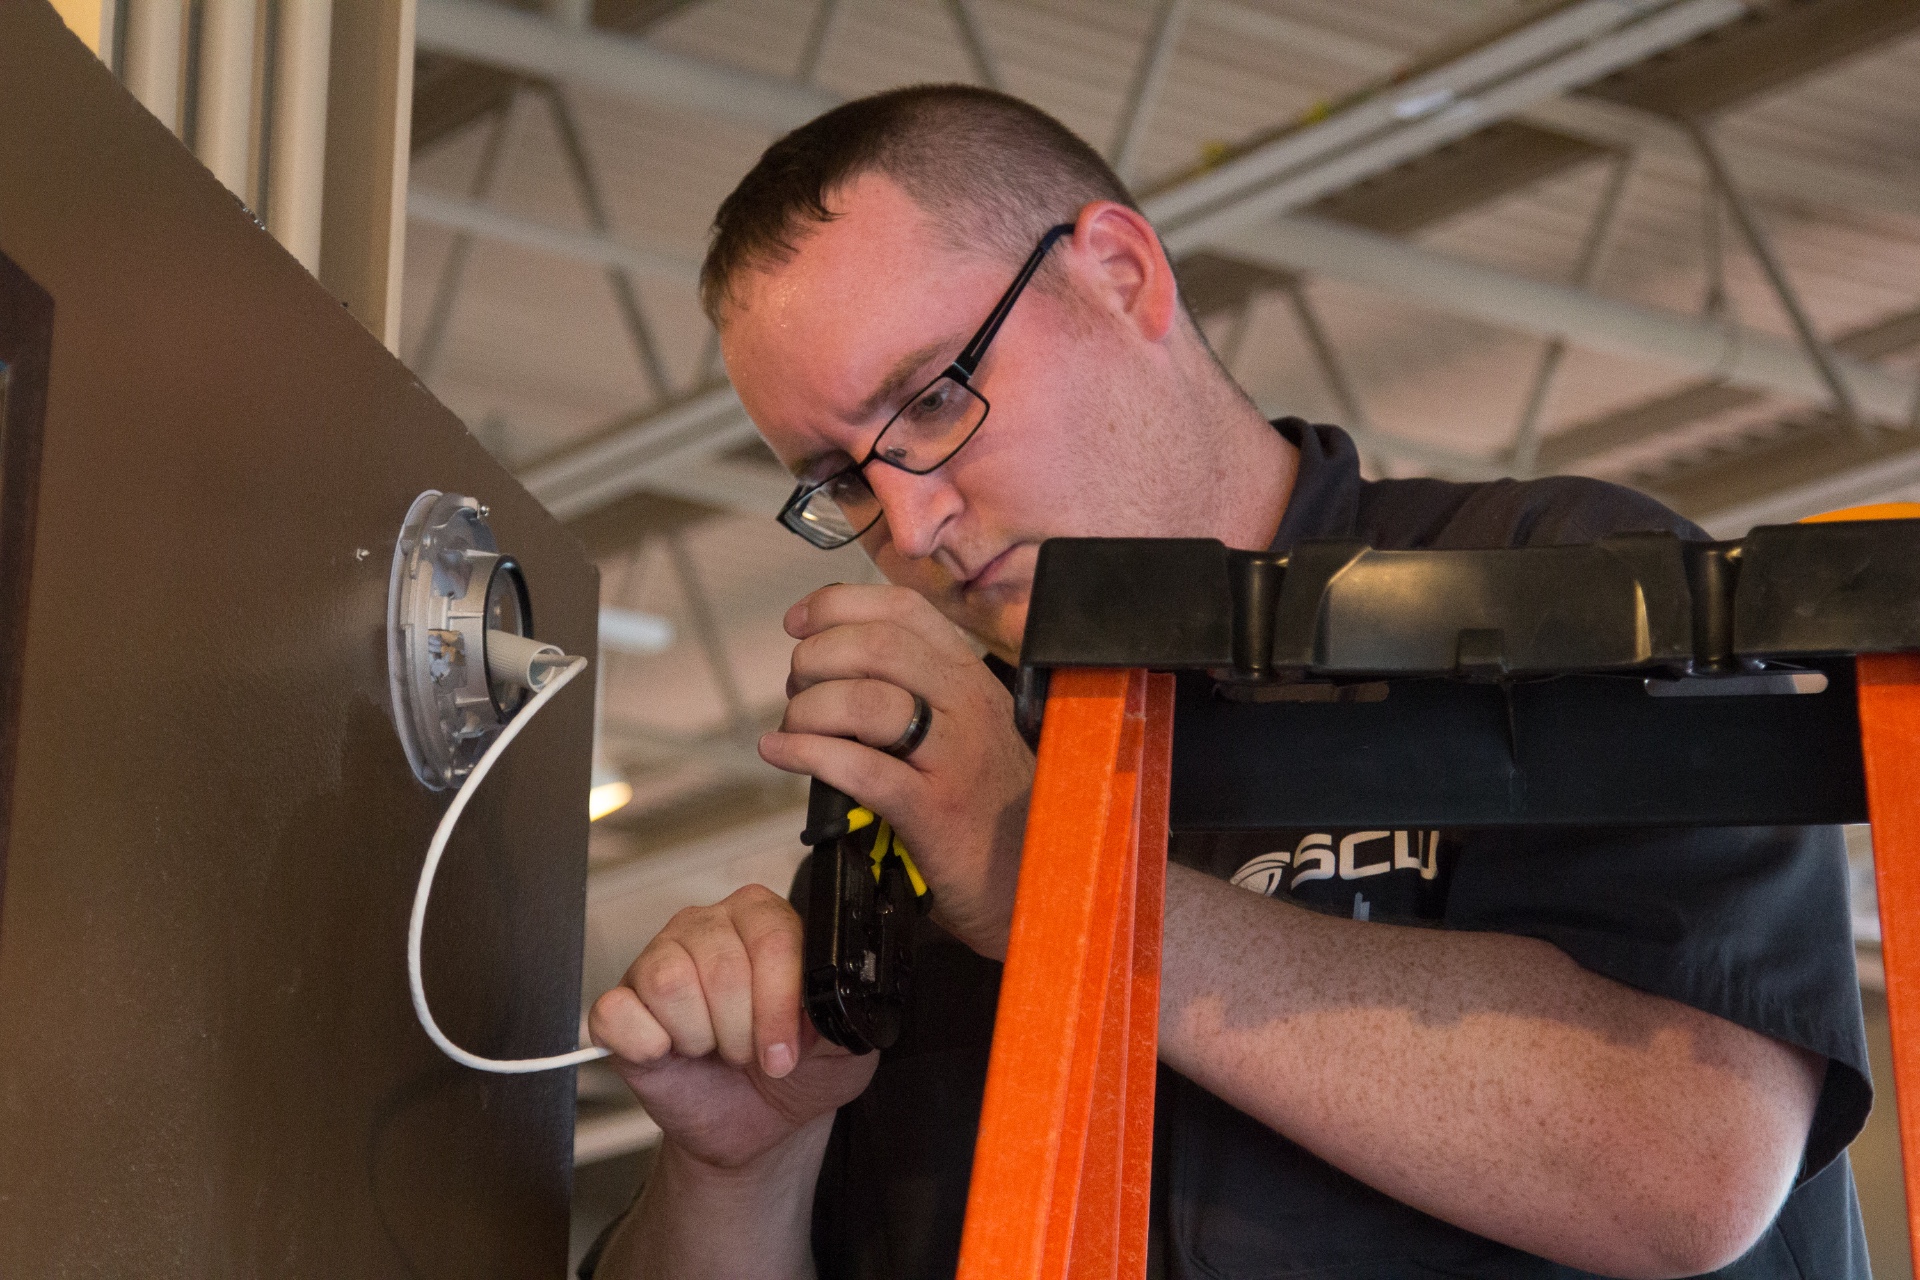
Step 5: Terminate the RJ45 for the Cable Coming Through the Wood
Run the ethernet cable through the mounting box, install the weatherproof connector, and terminate the end.
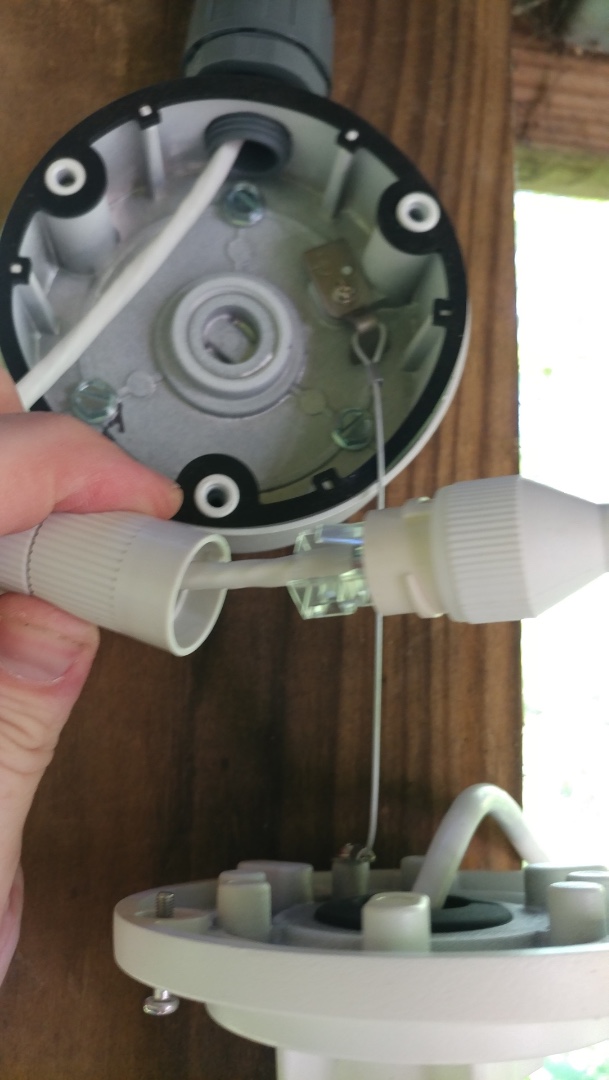
Step 6: Attach the Waterproof Connector to the Crimped RJ45 Cable Run And Connect the Camera RJ45 Lead
Connect cameras RJ45 lead to cable and connect weatherproof coupler.
In the example, we have installed a Bullet Camera with an Electrical Mounting Box, and connected the camera.
Optional Step 7:
Attach camera to the mounting box using supplied fasteners, if you used a mounting box.