


likes
$120.00
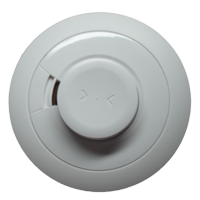
Residential 3-in-1 Smoke, Fire, and Temperature Sensor for SCW Shield - 74SFT
In stock
Usually ships the same business day if ordered before 2PM EST.
SKU
74SFT
Environmental Sensors require Smart Monitoring.
Detects
Smoke (Photoelectric)
Heat
Abrupt Temperature Increases
One of the only Fire Sensors that can be used in the kitchen!
Alerts
Integrated Siren
Contacts the Central Monitoring Station Immediately and Sends Fire Rescue.
Does not send an alert or wait for your response, as smoke or fire can make people non-responsive.
Battery
Averages 10 years

Don't let burning toast spoil your day! Our 3-in-1 sensor allows you to turn off the smoke function and just use the Heat and Rate-of-Rise Temperature feature, so that cooking mishaps doesn't set off your siren and send the fire department!”
Images


Need Installation?
No Problem
Whether you plan to DIY install or want us to do it for you, we're as flexible as you need.
Get a Custom Quote for Equipment or Installation
Environmental Sensors require Smart Monitoring.
Detects
Smoke (Photoelectric)
Heat
Abrupt Temperature Increases
One of the only Fire Sensors that can be used in the kitchen!
Alerts
Integrated Siren
Contacts the Central Monitoring Station Immediately and Sends Fire Rescue.
Does not send an alert or wait for your response, as smoke or fire can make people non-responsive.
Battery
Averages 10 years
Integrated Siren
Three in One: photoelectric smoke, fixed heat, and rate-of-rise detection in one sensor
Where should I put carbon monoxide and smoke detectors?
Siren sounds at 85dBA at 10 feet minimum
Battery typically lasts 10 years
Meets UL217 and ULC531 specifications
4.7 x 4.1 x 1.5 inches
Certifications: FCC, IC, UL217, ULC531, CSFM
Three-in-One Smoke, Fire, and Temperature Sensor for SCW Shield
Physical Specifications |
|
|
Housing Dimensions
|
3.3 x 1.4 x 1.1 inches (8.3 x 3.6 x 2.7 centimeters)
|
|
Weight with Battery
|
7.36 ounces (210 grams)
|
|
Mounting Hardware
|
#6 Screws and anchors (provided)
|
Environmental Specifications |
|
|
Operating Temperature
|
40°F to 100°F (4.4°C to 37.8°C), Long Term
|
|
Maximum Humidity
|
15% to 95% non-condensing relative humidity
|
Sensor Specifications |
|
|
Frequency
|
433.92 MHz
|
|
Replacement Battery
|
Two Panasonic CR123A
|
|
Transmitted Indications
|
Low Battery, Supervision
|
|
Loudness
|
85 dBA at 10 feet (3m) minimum
|
|
Smoke Sensitivity
|
1.95% to 4% OBS/Foot
|
|
Heat Sensitivity
|
135 ± 5°F (57 ± 2°C)
|
Certifications |
|
|
Certifications
|
FCC, IC, UL217, ULC531, EN 60950-1, EN 300 220, EN 301 489, CE
|
NATIONAL FIRE PROTECTION ASSOCIATION REQUIRED PROTECTION Instructions
Smoke Detection. Where required by applicable laws, codes, or standards for the specified occupancy, approved single- and multiple-station Smoke Alarms shall be installed as follows:
(1) In all sleeping rooms and guest rooms
(2) Outside of each separate dwelling unit sleeping area within 6.4 m (21 ft) of any door to a sleeping room, the distance measured along a path of travel
(3) On every level of a dwelling unit, including basements
(4) On every level of a residential board and care occupancy (small facility), including basements and excluding crawl spaces and unfinished attics
(5) In the living area(s) of a guest suite
(6) In the living area(s) of a residential board and care occupancy (small facility)
Installation Procedure
1. Select a location complying with the advice above.
2. Lift off the mounting plate from the Smoke Alarm.
3. Place the mounting plate on the ceiling exactly where you want to mount the Alarm. With a pencil, mark the location of the two screw holes.
4. Taking care to avoid any electrical wiring in the ceiling, drill holes using a 5.0mm drill bit through the centre of the marked locations. Push the plastic screw anchors provided into the drilled holes. Screw the mounting plate to the ceiling.
5. Insert the battery or batteries, ensuring the orientation is correct. If the battery is already installed in your Alarm just pull the battery tab to power the Alarm.
6. Carefully line up the Alarm on to the mounting plate, gentle press home and twist clockwise. Install all the other Alarms similarly.
7. Press the Test button on each Alarm to ensure that the Alarm works
Positioning
Ceiling Mounting
Hot smoke rises and spreads out, so a central ceiling position is the recommended location. The air is “dead” and does not move in corners, therefore Smoke Alarms must be mounted away from corners. Keep at least 305mm (12”) from walls and corners (see Figure 3). Additionally, mount the unit at least 305mm (12”) from any light fitting or decorative object which might prevent smoke entering the Smoke Alarm.
Wall Mounting
If ceiling mounting is impractical, Smoke Alarms may be mounted on a wall, provided that:
a) the top of the detection element is between 150mm (6”) and 305mm (12”) below the ceiling
b) the bottom of the detection element is above the level of any door openings; Wall mounting should only be considered where close spaced beams or similar obstructions may preclude ceiling mounting. It is considered to be the responsibility of the installer/client to determine if the presence of asbestos in the ceiling material would make ceiling mounting ‘impractical’.
On a Sloping Ceiling
With a sloping or peaked ceiling install a Smoke Alarm within 610mm (24”) of the peak (measured vertically). If this height is less than 610mm (24”) the ceiling is regarded as being flat (see Figure 4).
Locations to avoid
DON’T place Smoke Alarms in any of the following areas:
• Bathrooms, kitchens, shower rooms, garages or other rooms where the Smoke Alarm may be triggered by steam, condensation, normal smoke or fumes. Keep at least 6 metres (20ft) away from sources of normal smoke/fumes.
• Locate away from very dusty or dirty areas as dust build-up in the chamber can impair performance. It can also block the insect screen mesh and prevent smoke from entering the smoke detector chamber.
• Do not locate in insect infested areas. Small insects getting into the smoke detector chamber can cause intermittent alarms.
• Places where the normal temperature can exceed 100°F (38.7°C) or be below 40°F (4.4°C) (e.g. attics, furnace rooms, directly above ovens or kettles etc.) as the steam could cause nuisance alarms.
• Near a decorative object, door, light fitting, window moulding etc., that may prevent smoke from entering the Alarm.
• Surfaces that are normally warmer or colder than the rest of the room (e.g. attic hatches). Temperature differences might stop smoke from reaching the Alarm.
• Next to or directly above heaters or air conditioning vents, windows, wall vents etc. that can change the direction of airflow.
• In very high or awkward areas (e.g. over stairwells) where it may be difficult to reach the Alarm (for testing, hushing or battery replacement).
• Locate the Alarm at least 1m (39”) from dimmer controlled lights and wiring as some dimmers can cause interference.
• Locate Alarm at least 1.5m (59”) and route wiring at least 1m away from fluorescent light fittings as electrical “noise” and/or flickering may affect the unit./ images