


likes
$99.99
Z-Wave Home Automation Control Card for SCW Shield Alarm Hub - 74ZWC
In stock
Usually ships the same business day if ordered before 2PM EST.
SKU
74ZWC
Allows you to utilize thousands of Z-Wave devices within the SCW Alarm's Home/Business Automation Controls
Images

Need Installation?
No Problem
Whether you plan to DIY install or want us to do it for you, we're as flexible as you need.
Get a Custom Quote for Equipment or Installation
Allows you to utilize thousands of Z-Wave devices within the SCW Alarm's Home/Business Automation Controls
If you order the Alarm Hub and the Z-Wave card at the same time, we'll install it for you, before it ships.
SCW can only provide very basic technical support for non-SCW devices.
We're happy to assist you in helping get your Z-Wave card to work with the thousands of devices that work on the Z-Wave standard or with legacy alarm equipment. However, our support is limited in this regard.
Because we do not control or carry non-SCW devices, we cannot:
- Troubleshoot why your device isn't working properly if it fails to respond in a normal manner
- RMA or repair third party devices
- Guarantee that these third-party devices will continue to work in the future
The security industry generally uses closed ecosystems. We try to be as open as possible, however, SCW cannot prevent third parties from changing their protocols or locking down their devices.
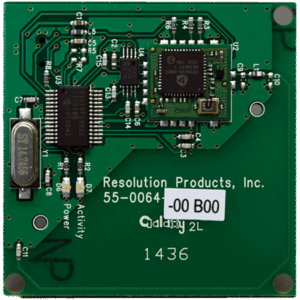
LED Lights
Red LED: Activity
Normally off
Flashes with each Zwave message received from the panel
Green LED: Power
On - When the panel is AC powered
Off - When panel does not have AC power
Allows you to utilize thousands of Z-Wave devices and some legacy alarm sensors by GE, Napco, Honeywell, DSC, and 2GIG within the SCW Alarm's Home/Business Automation Controls
How to Install the Z-Wave card in your SCW Shield Alarm Hub
As long as you ordered the expansion card when you ordered your SCW Shield Alarm Hub, you won't have to. We do it for you before we ship either unit for you.
If you ordered them at a different times, you will have to install it yourself, but it is pretty easy to do. Here's a handy PDF on how to do it. Feel free to give us a call if you have any issues.
This module can be placed in expansion slot 3 of the SCW Shield panel.
How to add third-party sensors
With the translator, sensors are enrolled into the panel via RF transmission. Once enrolled, the zones are configured in the panel the same way as Shield zones. It is important to follow enrollment instructions carefully, and execute the steps in order, so that devices are enrolled properly. Before enrollment, the panel will first need to be set to the proper translator protocol and save the panel settings.
Adding Z-Wave Devices
1. Prior to adding a new device, if that device has ever been previously used with any other system, or if you’re not sure, the device MUST be first deleted to remove old enrollment settings from the old system.
2. If deleting a device, and either the website or mobile app says “failure”, you MUST try to delete the device again until you get a “success”. You may have to delete a device 2-3 times in some rare cases. Getting a “failure” when deleting the device may leave it in an unknown state, able to enroll or not, or partially enroll and cause hidden problems later.
3. After a device has been successfully deleted from the old system, (or removed from the current system), now may now attempt to add the device. If during the add process you get a “failure” at any point, you MUST start the process over by deleting the device before trying to add it again. Attempting to add the device again without first deleting it, again may cause the device to get stuck in some half enrollment state.
4. If a household has multiple devices, it is good practice to unplug or unpower the other devices while trying to add or remove a new device. Once the SCW Shield is in ADD or DELETE mode, ANY device in the vicinity can be added or deleted.
Some devices, such as the Linear light switches, will automatically respond to any “add” or “delete” command from the SCW SHield (if they’re un-enrolled) even without the installer pressing any buttons! If many of these switches are all powered at once, the first light switch that responds will be added and you will have no idea which one it was, or one that you didn’t intend. This is especially troublesome when trying to delete one of these light switches, but every other light switch on the system is responding to the command all at the same time, so you have no idea which light switch was actually deleted.
Many device autonomously report state changes, if a device such as a thermostat decides to send a temperature report at the same time you are adding or deleting a new device, the SCW Shield may accidentally remove, or re-add the thermostat instead!
When enrolling devices, it is good practice to have them within direct range of the SCW Shield. The IGMs DO support adding or deleting devices across a Z-Wave network without direct range, however many devices on the market do not support this feature and it doesn’t always work correctly or reliably.
General Z-Wave Notes
Z-Wave has limited range, so install devices close together. 50 feet max, even less if there walls in between the devices. If customer wants to place a device farther than this, or customer is having range issues, place some devices in between the SCW Shield and the end device to fill the gap. Z-Wave messages should hop from device to device, each device that has wall power usually acts as a repeater (mesh system).
Every Z-Wave device has its own way to enroll into the SCW Shield so please refer to that device's manual. Some require a single button press, some require two, some require a key code sequence; they’re all different.
Low batteries in door locks can cause a myriad of problems. It is not much of an issue with Schlage or Yale locks, but mostly an issue with Kwikset locks. Even if the battery level is reporting 70% life with Kwikset and it’s having problems, replace the batteries.
/ images