How to Setup NAS backup on a SCW Admiral or Imperial NVR
A NAS, or Network Attached Storage, is an easy way to either increase the storage space available to your recorder or have a redundant, off-recorder, storage device, allowing you to have two copies of recorded footage.
You set both the internal and NAS hard drives into groups and assign the cameras to groups. This way you can set some cameras to record longer than others.
NAS backup is available on all of our Admiral or Imperial NVRs, except for ADM8P8-V2M, ADM16P16-V2M, and ADMP16P16-V2M.
Pros and Cons of NAS Backup
- Pros: Redundant footage up to 30TB
- Cons: Setup takes some time, do NOT expect to dual use the NAS
Note: The footage on the NAS is not accessible directly on the NAS. The NAS must be linked to an NVR in order to show that footage. You can not pull files directly off the NAS.
NAS Backup Network Setup
NAS needs to be availible on the same network network as the NVR.
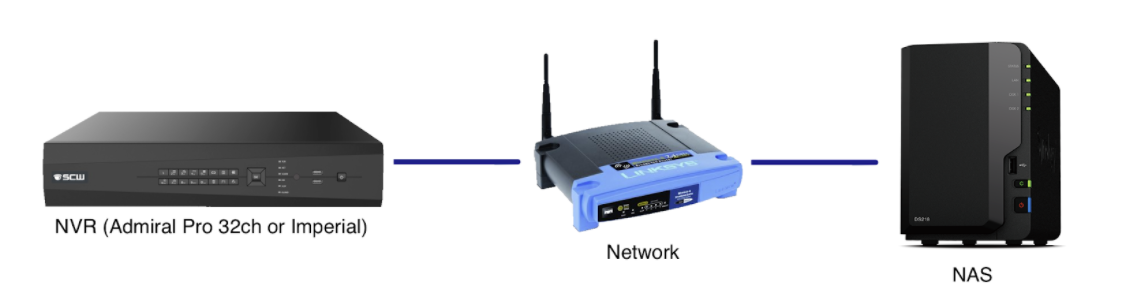
Our Admiral Pro 32 channel and Imperial line of NVRs allows redundant footage in the form of a NAS. NAS redundancy records in real time and allows you to select which cameras you want to record redundantly.
So for example, if you only want to back up the critical, cash register cameras, you can choose them and not backup the less important outside cameras.
NAS Backup NAS Setup
SCW proudly carries Synology NAS’s.
Note: If you are sourcing your NAS elsewhere, we won't be able to help with setup. Make sure your NAS supports NFS shares. Also, you will need to find the ip address of that NAS by whatever means is suggested for that manufacturer.
Synology NAS Initial Setup
Synology NAS's are by default on DHCP and will automatically get an IP on the network. You can easily find Synology on the LAN by going to find.synology.com and logging in to start the setup process.
Once you connect after finding it via find.synology.com you will be sent through a self guided initial setup. HIt connect to start this process:
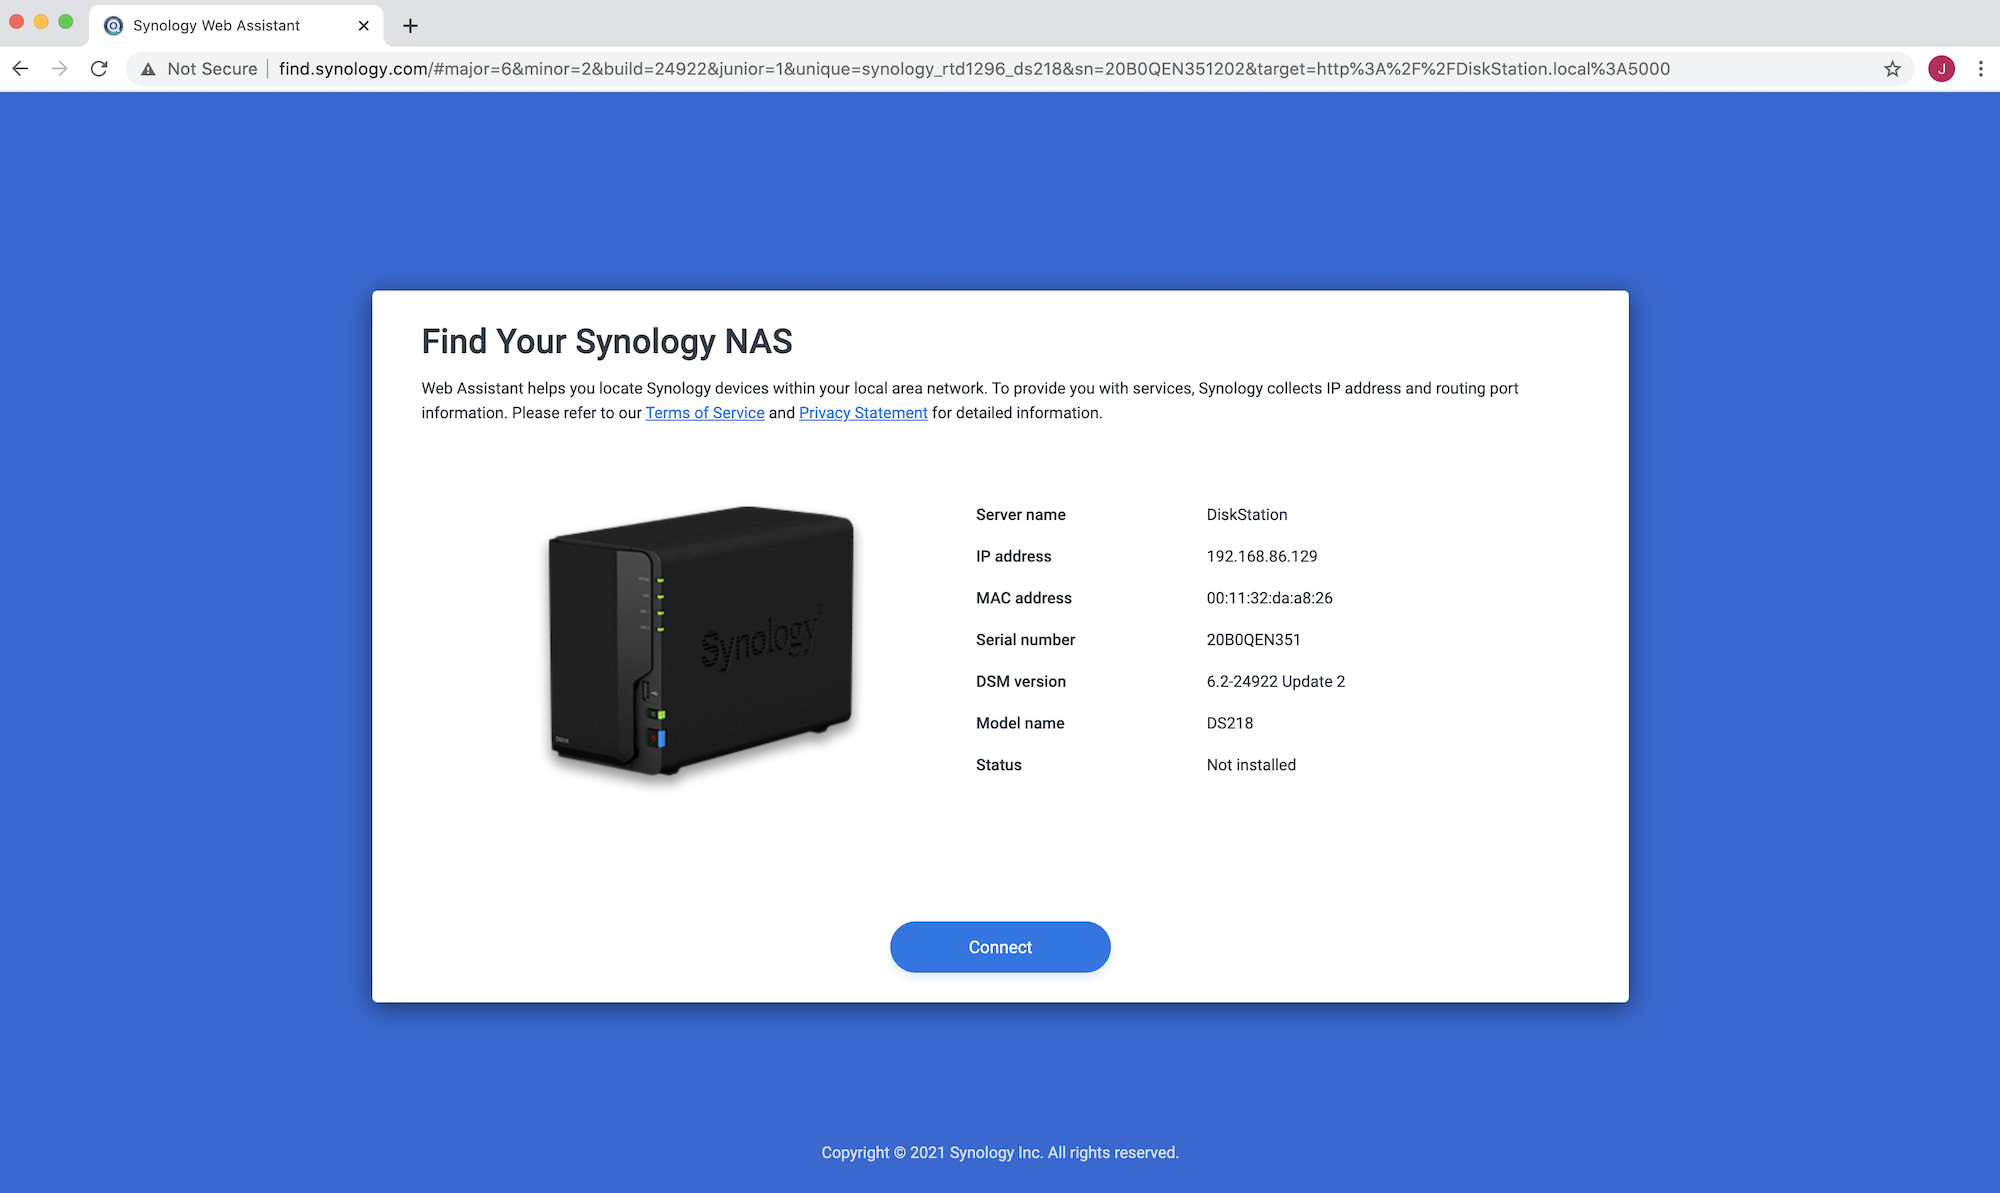
Once you connect after finding it via find.synology.com you will be sent through a self guided initial setup:
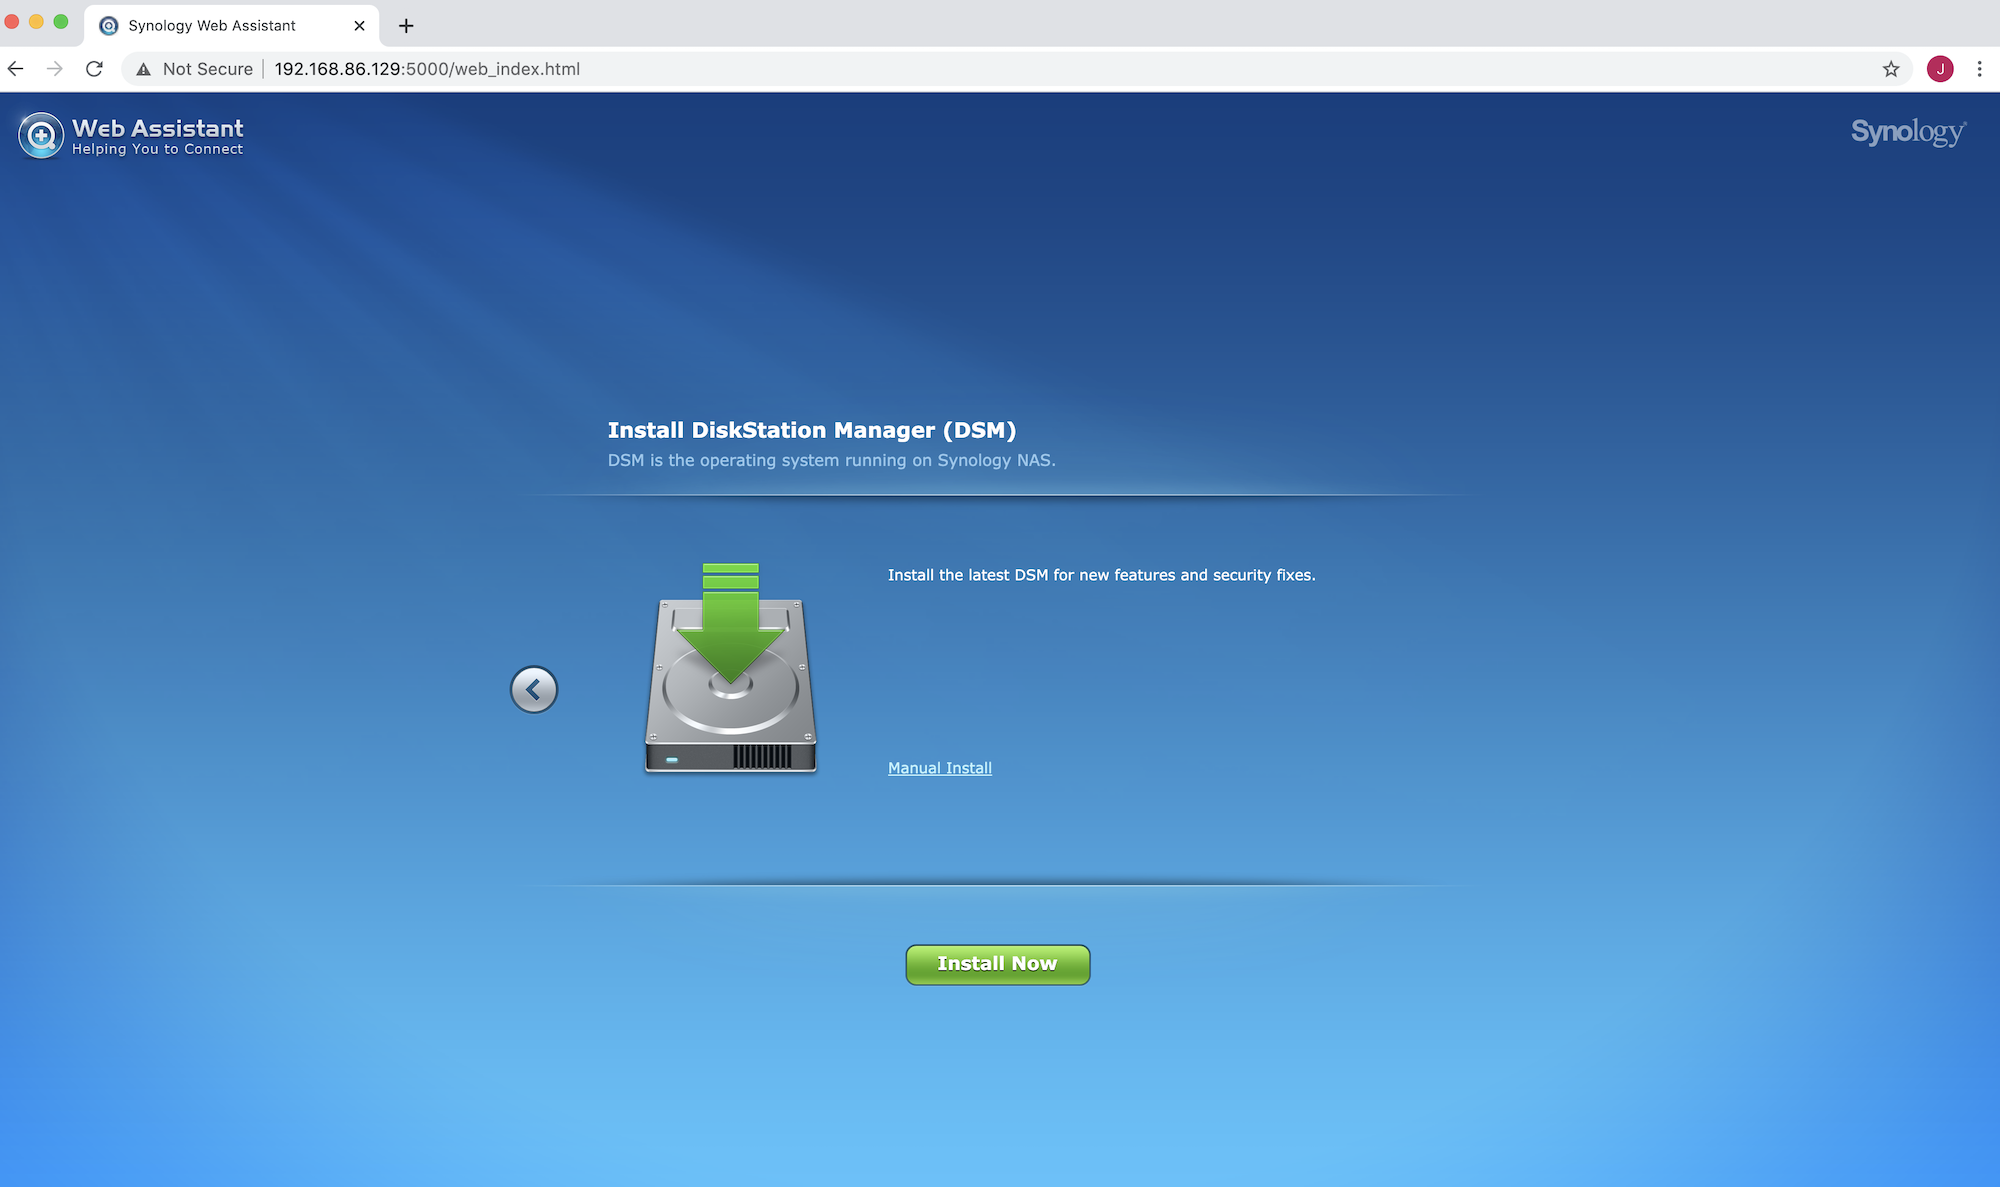
The first step is to install the Diskstation software (Synology software) on the NAS. Hit install now and the Synology will take care of the rest. Keep in mind, this will wipe the drive and everything on it. As mentioned earlier, this NAS should be considered a dedicated security application, and not be storing any other information, photos, etc.
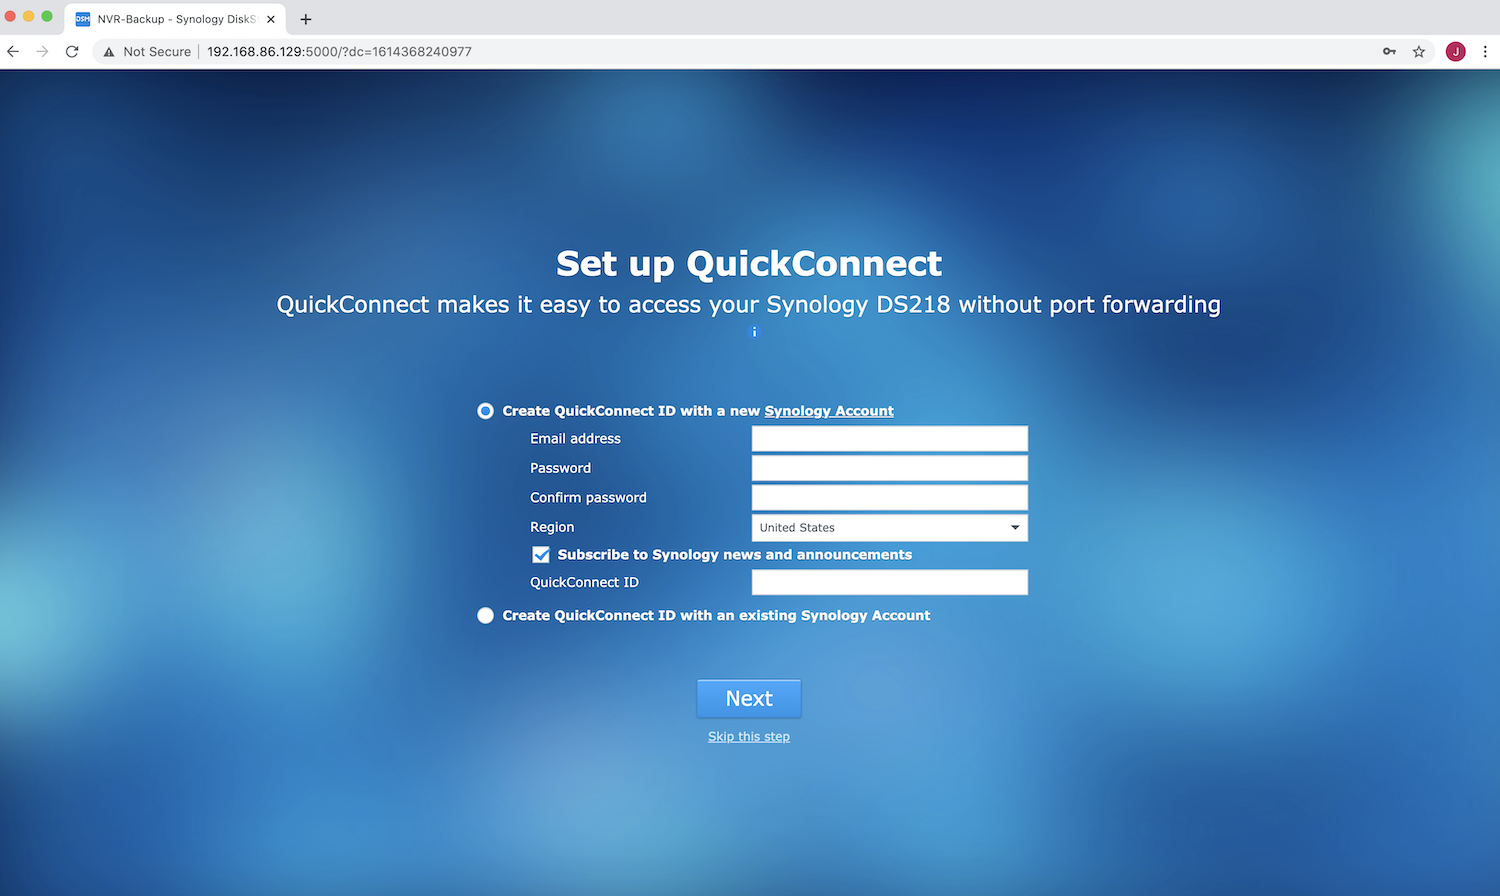
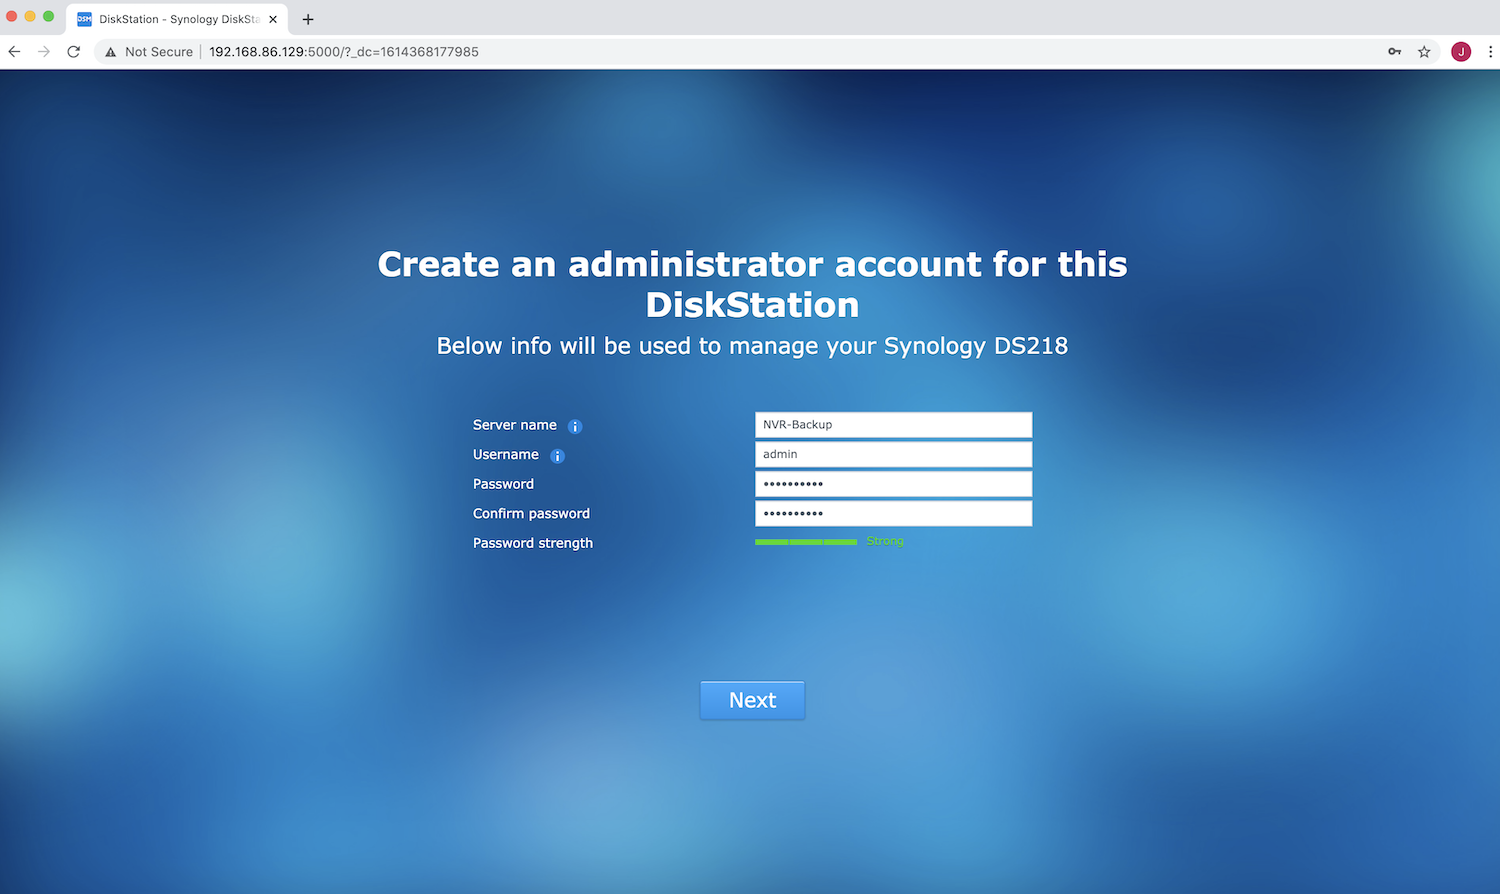
Once the setup is complete you will be asked to create a server name, username, and password.
The server name is just a nickname for the NAS - do whatever makes it easy to identify. Create a username and secure password for the Synology.
Important Note: The only way to reset the password on Synology is to use the reset button on the unit - this completely resets the entire system and will wipe all data on the the NAS and hard drives in it. Make sure you save the NAS username and password somewhere safe.
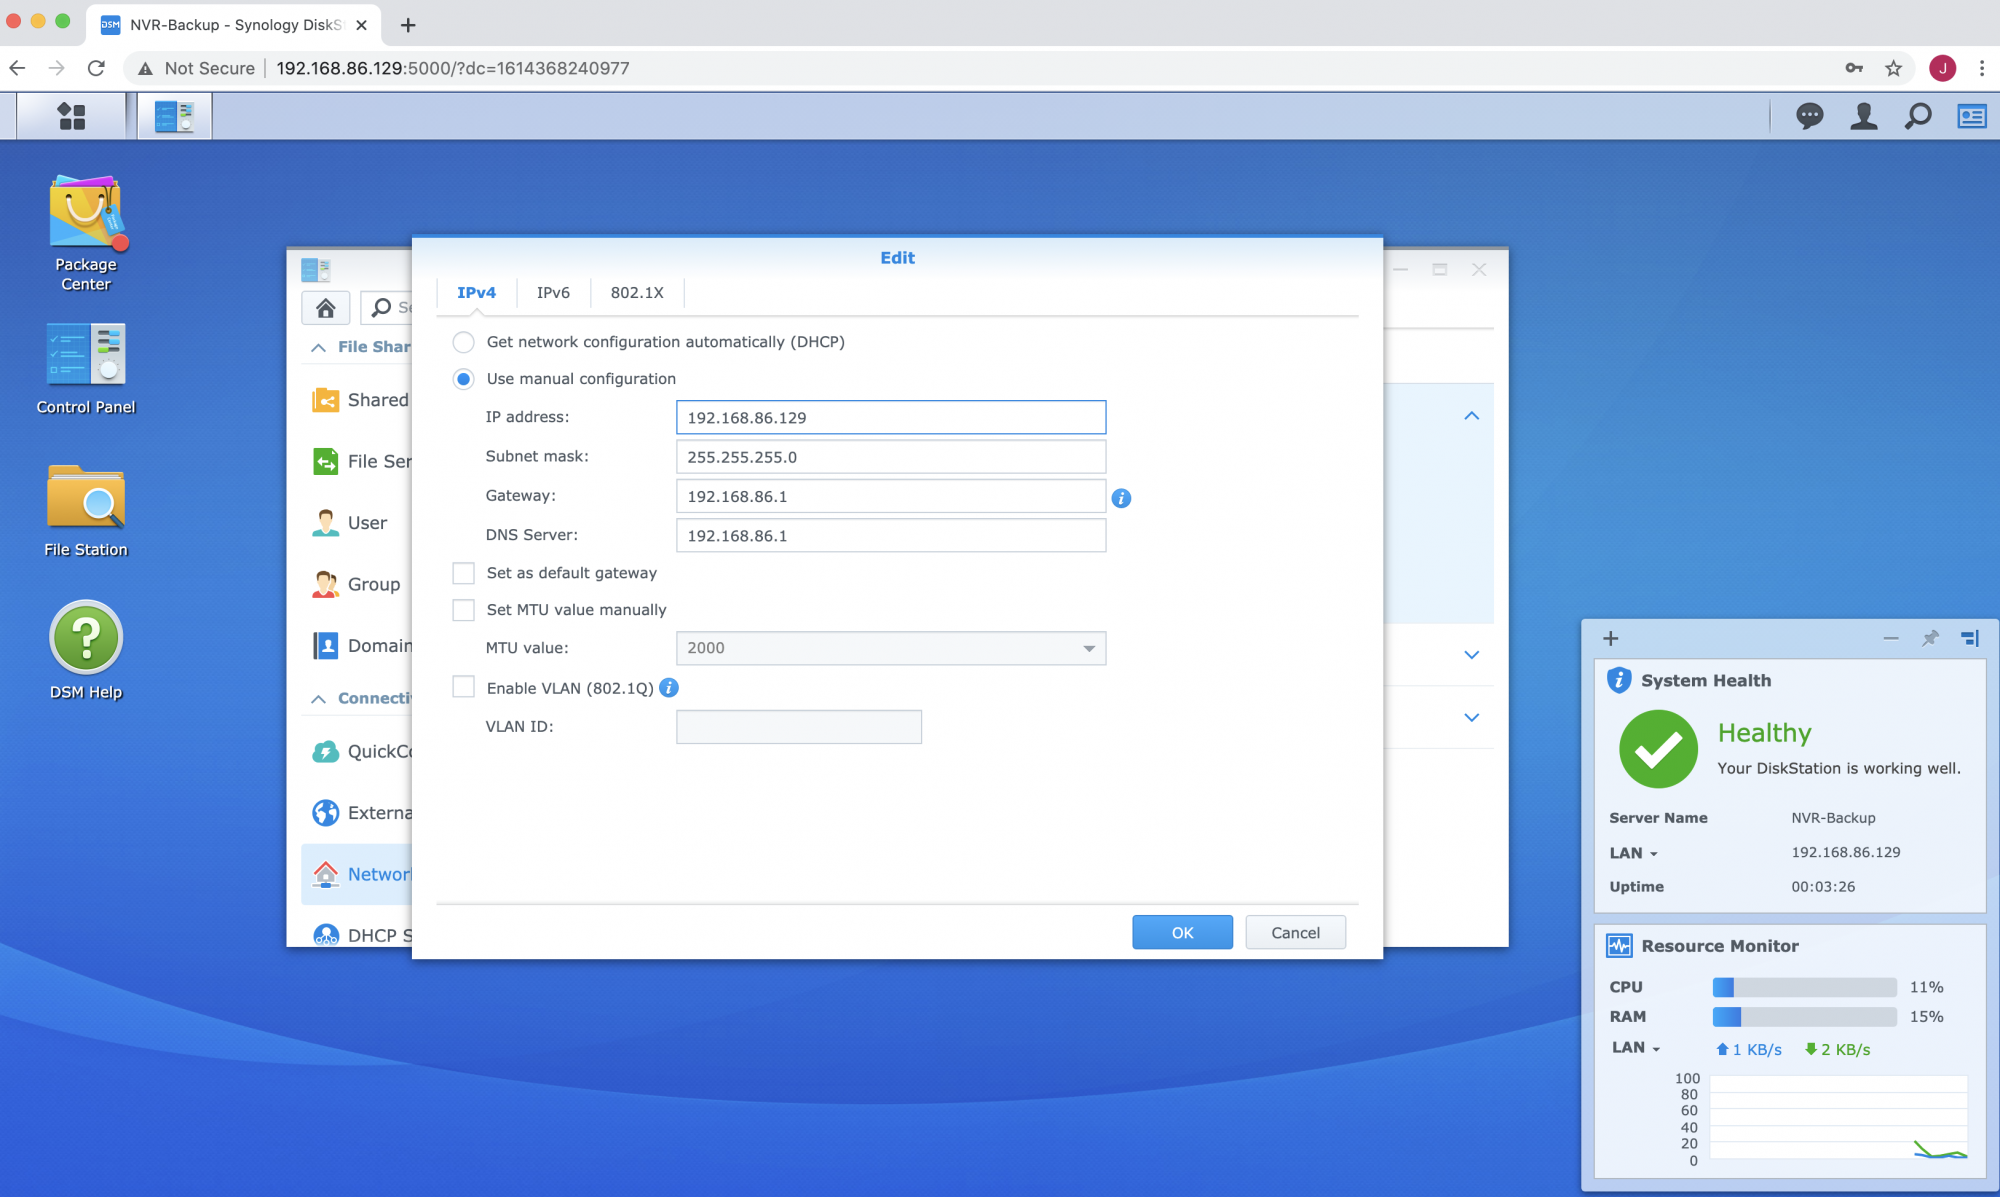
Set the NAS IP address to Static
In your favorite web-browser go to the ip address of the NAS.
To change the IP go to Control Panel - Network and locate Network Interface at the top. Click the LAN connection to unveil information.

Click Edit to bring up the Network Settings for the LAN connection. Uncheck DCHP and put in a free manual IP address there.
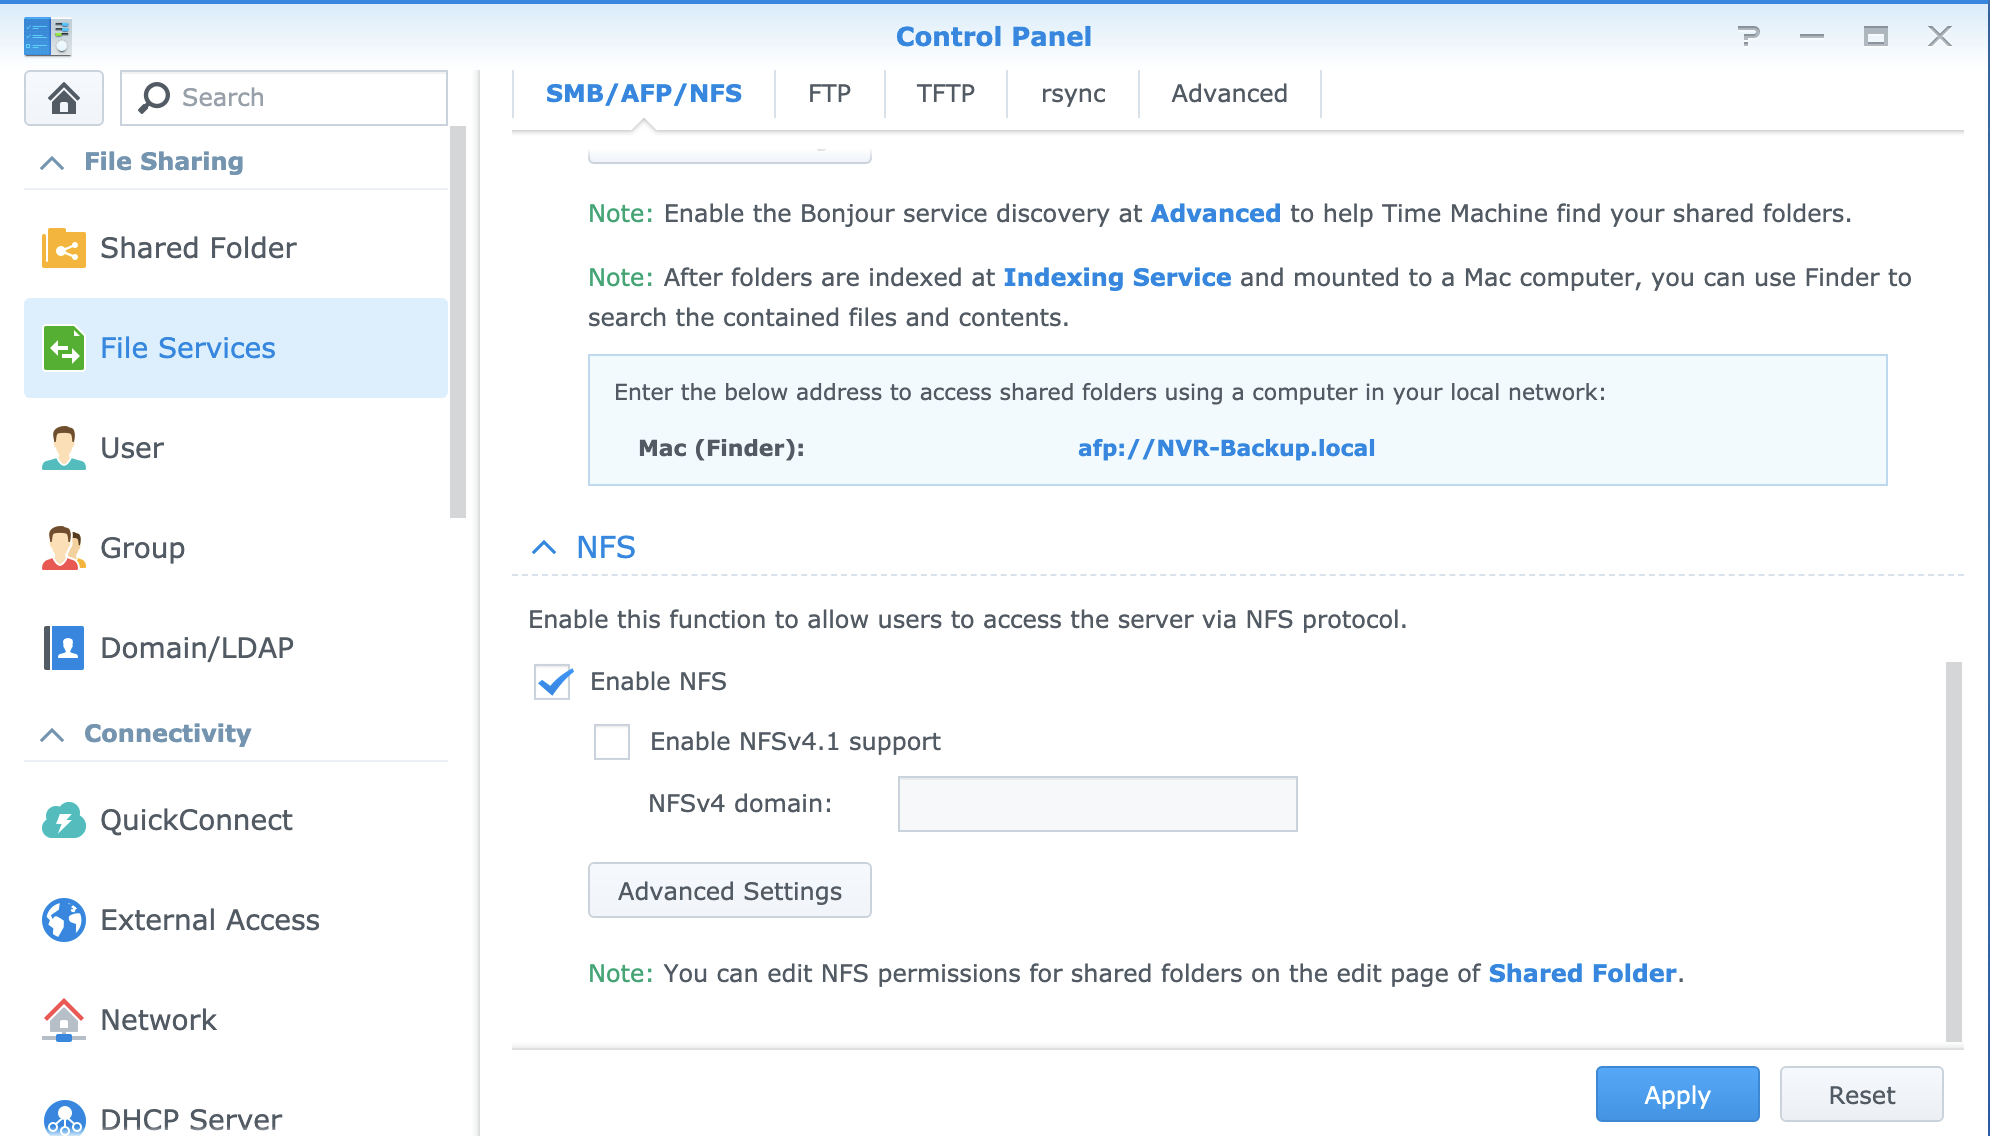
Set the NAS to be able to support NFS Shares
Once the IP is setup - the next step is to setup an NFS share. NFS Shares operate by creating a shared folder and giving permissions out via IP address, rather than usernames and passwords. It's critical that the NVR also be on a static IP, otherwise if the IP changes you will no longer have permissions.
To setup NFS on the Synlogy, go to Control Panel - File Services and scroll down to locate NFS - enable NFS and locate Shared Folder either on the left of the control panel or at the bottom of the NFS section.
In the Shared Folders section click create and fill in the information. Fill in the name (NVR is fine, whatever works) a description, and the volume. I unchecked recycle bin, but this step is not likely necessary.
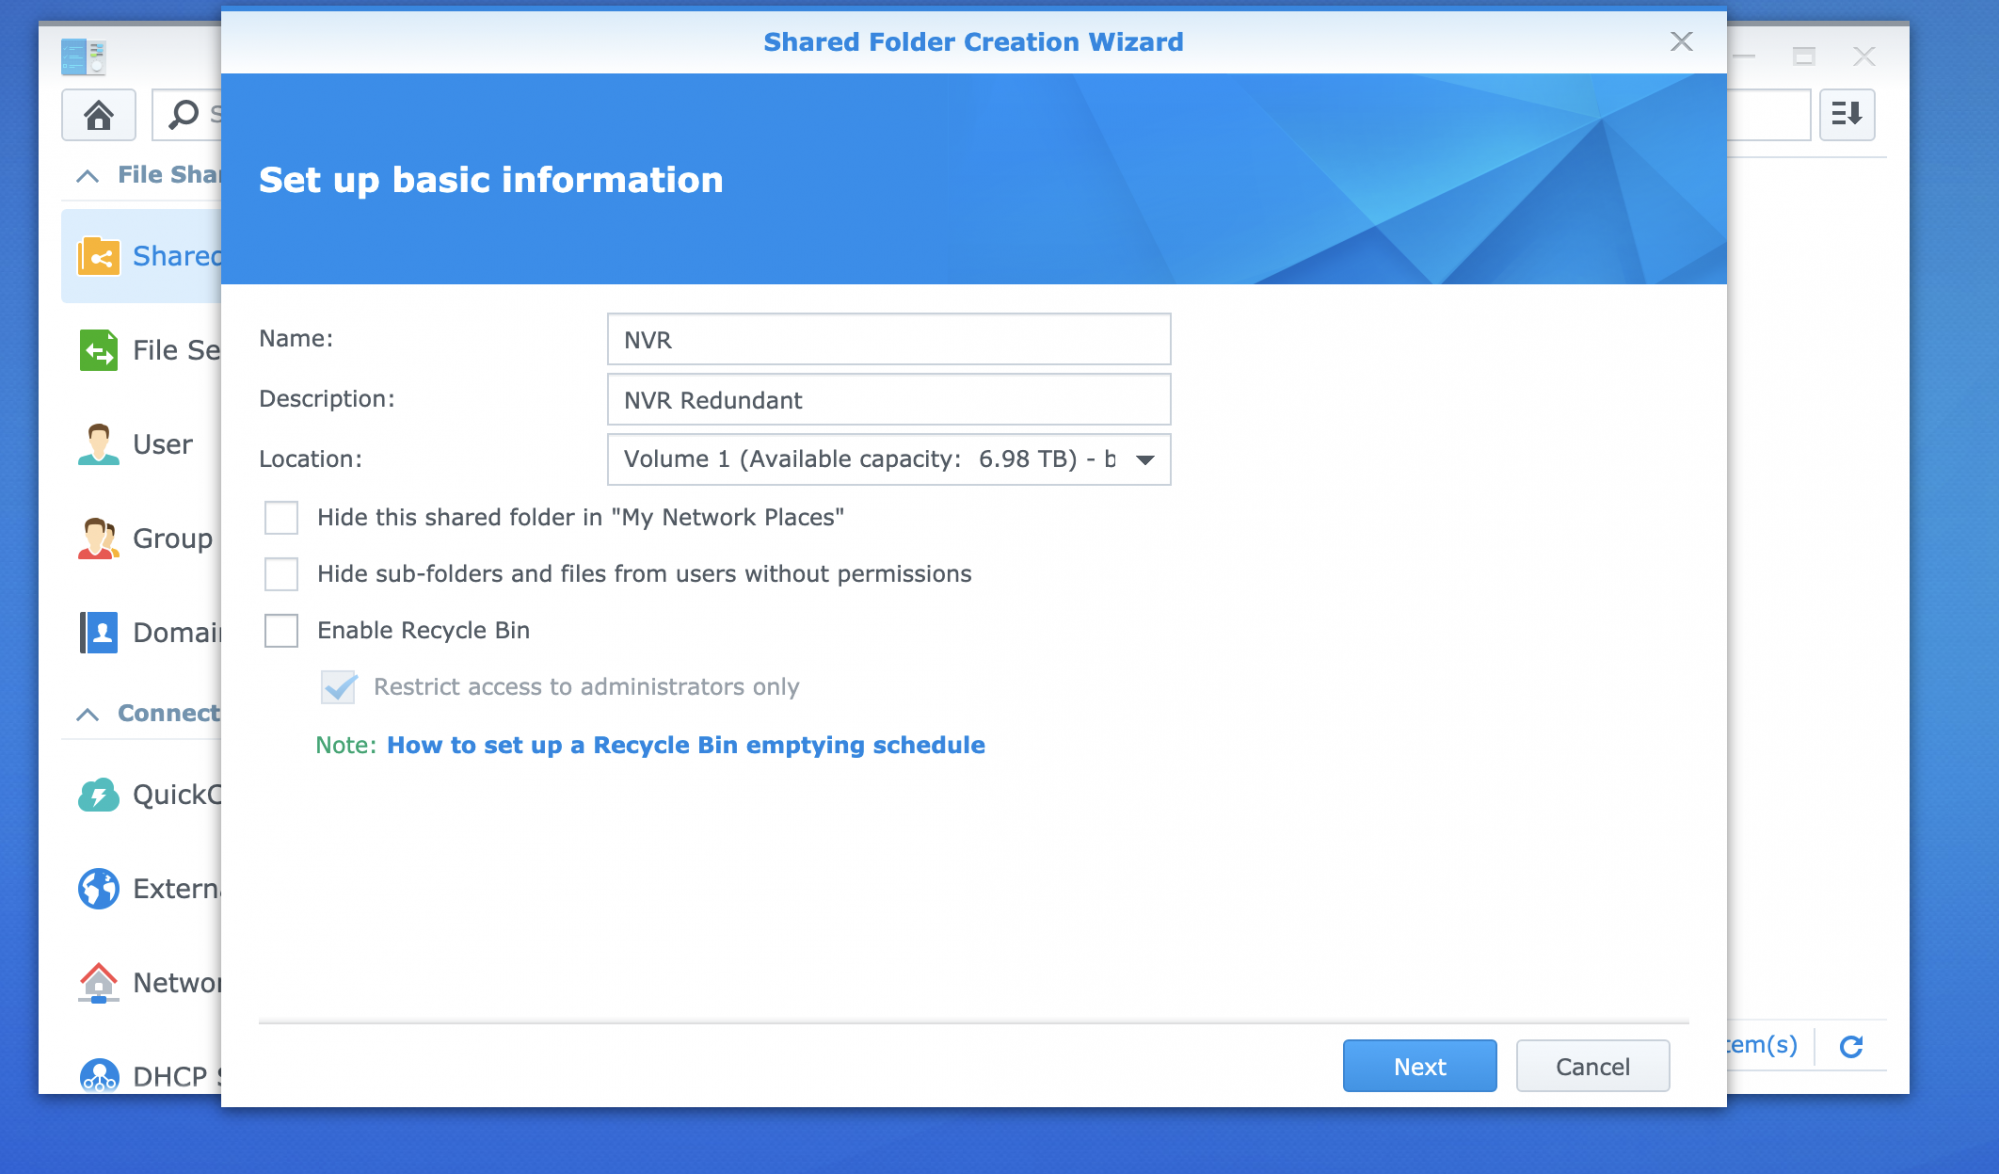
Once the shared folder is created, click Edit on the new shared folder and navigate to NFS permissions. Click create to create a new NFS rule.
Fill in the following information
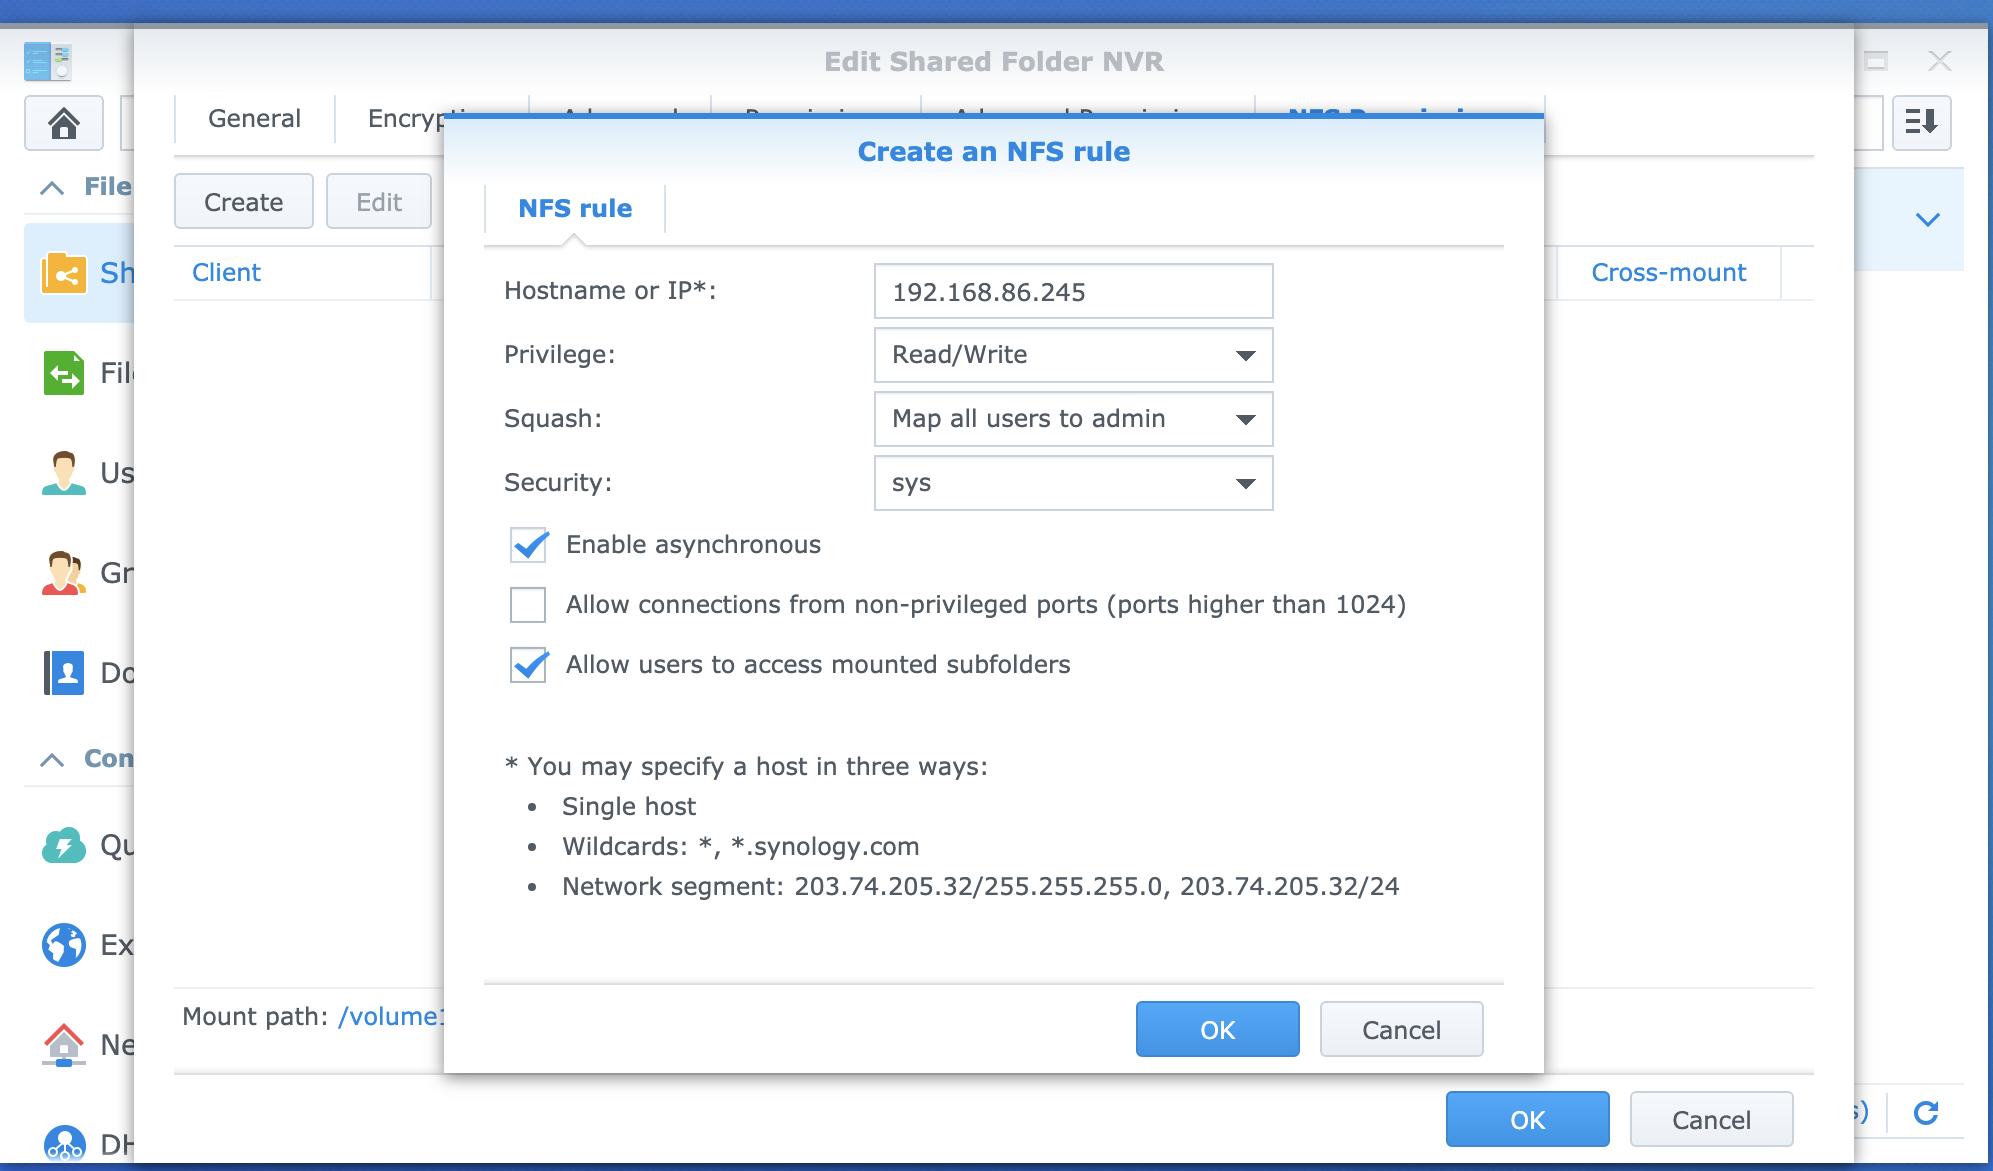
Hostname or IP: The IP of the NVR (in the image above the NVR was located at 192.168.86/245)
Privilege: Read/Write
Squash: Map all users to admin
Security: sys
check Enable asynchronous
check Allow users to access mounted subfolders
To setup NFS on the Synlogy, go to Control Panel - File Services and scroll down to locate NFS - enable NFS and locate Shared Folder either on the left of the control panel or at the bottom of the NFS section.
NAS NVR Setup Instructions
First, before you start, you will need to know the ip address of your NAS. This also needs to stay the changes, so you want to set that on your network as a fixed address.
From the web interface, navigate to the Hard Disk --> Hard Disk menu.
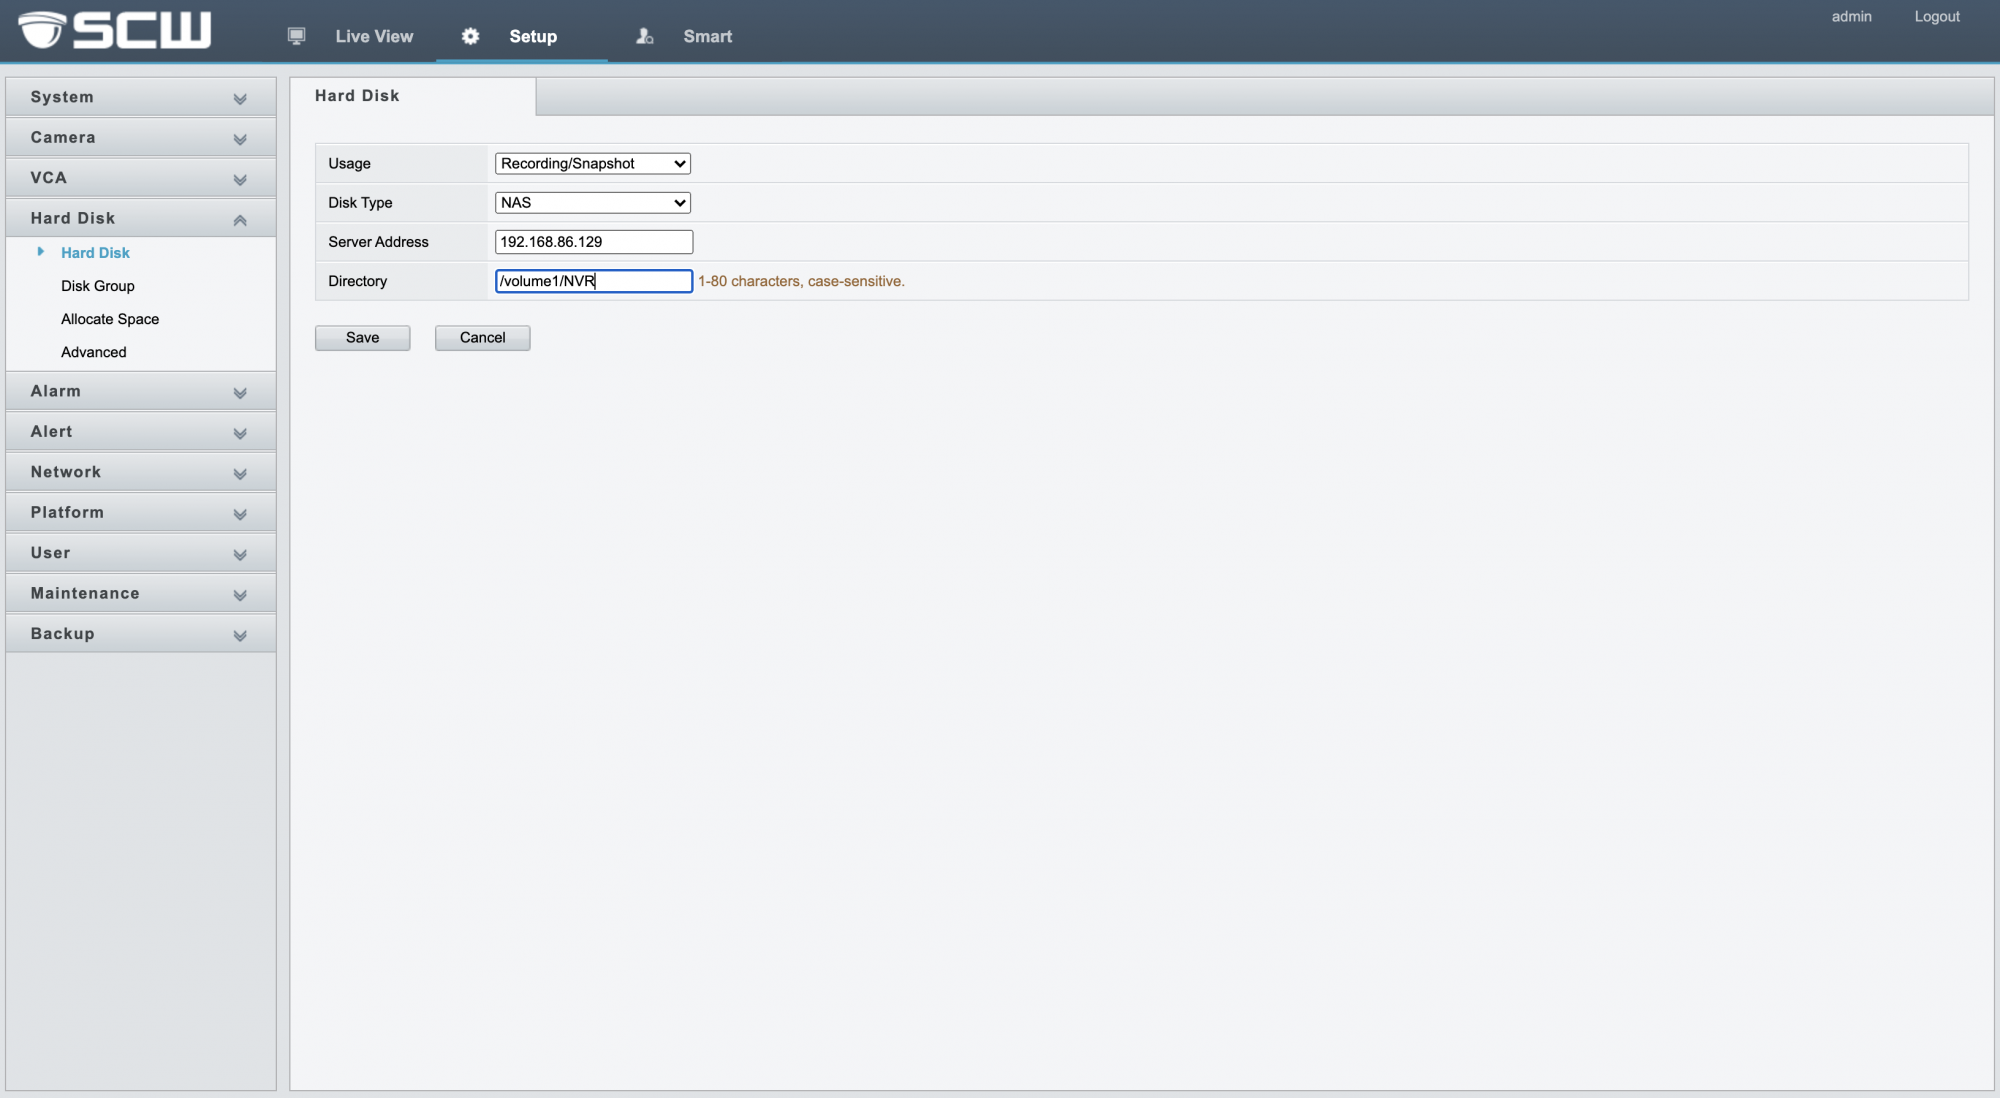
Set the Usage to Recording/Snapshot (Do NOT pick BACKUP. The backup option is for creating a one-time backup of the footage for long-term storage, not a continual redundant recording.)
Set the Disk Type: to NAS
Set the Server Address to the IP of the NAS
Directory: This will be listed in the NFS permissions section of the Shared Folder on the NAS.
Click Save to Add.
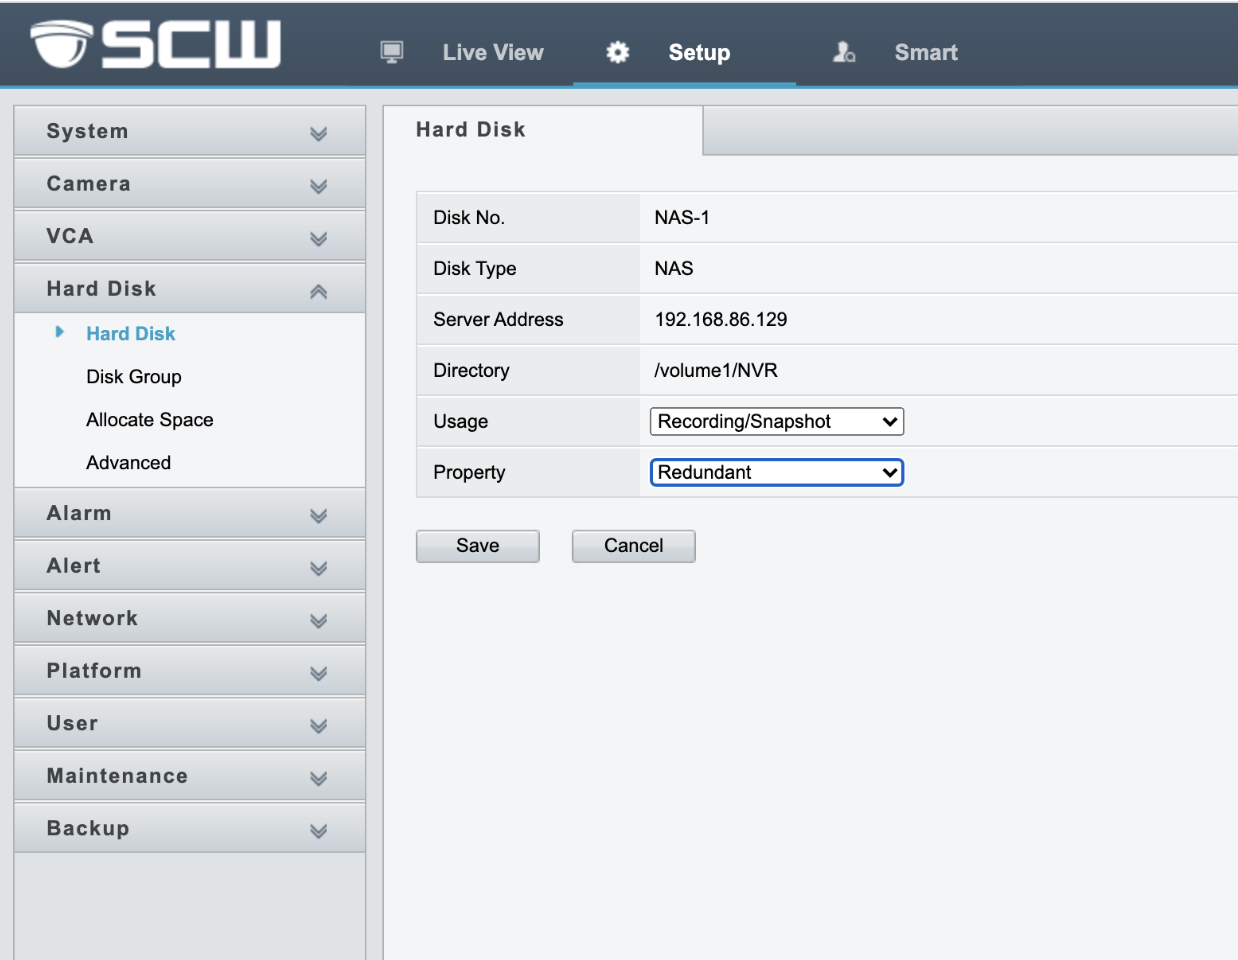
You will then need to format the drive, click the NAS and click format. To set the NAS as redundant click the configuration button and change the Property to Redundant. Be sure that in the hard drive list the NAS is reporting as "Normal".
Once the hard drive settings are finished - we can move onto the cameras to determine which cameras should be set to redundantly record.
Navigate to Camera - Schedule and click the camera you want to have redundant storage for. If you want it for all cameras, simply select the first camera and turn Redundant Recording On and hit save. You can then copy it to all camera by clicking the Copy To and selecting all Cameras.
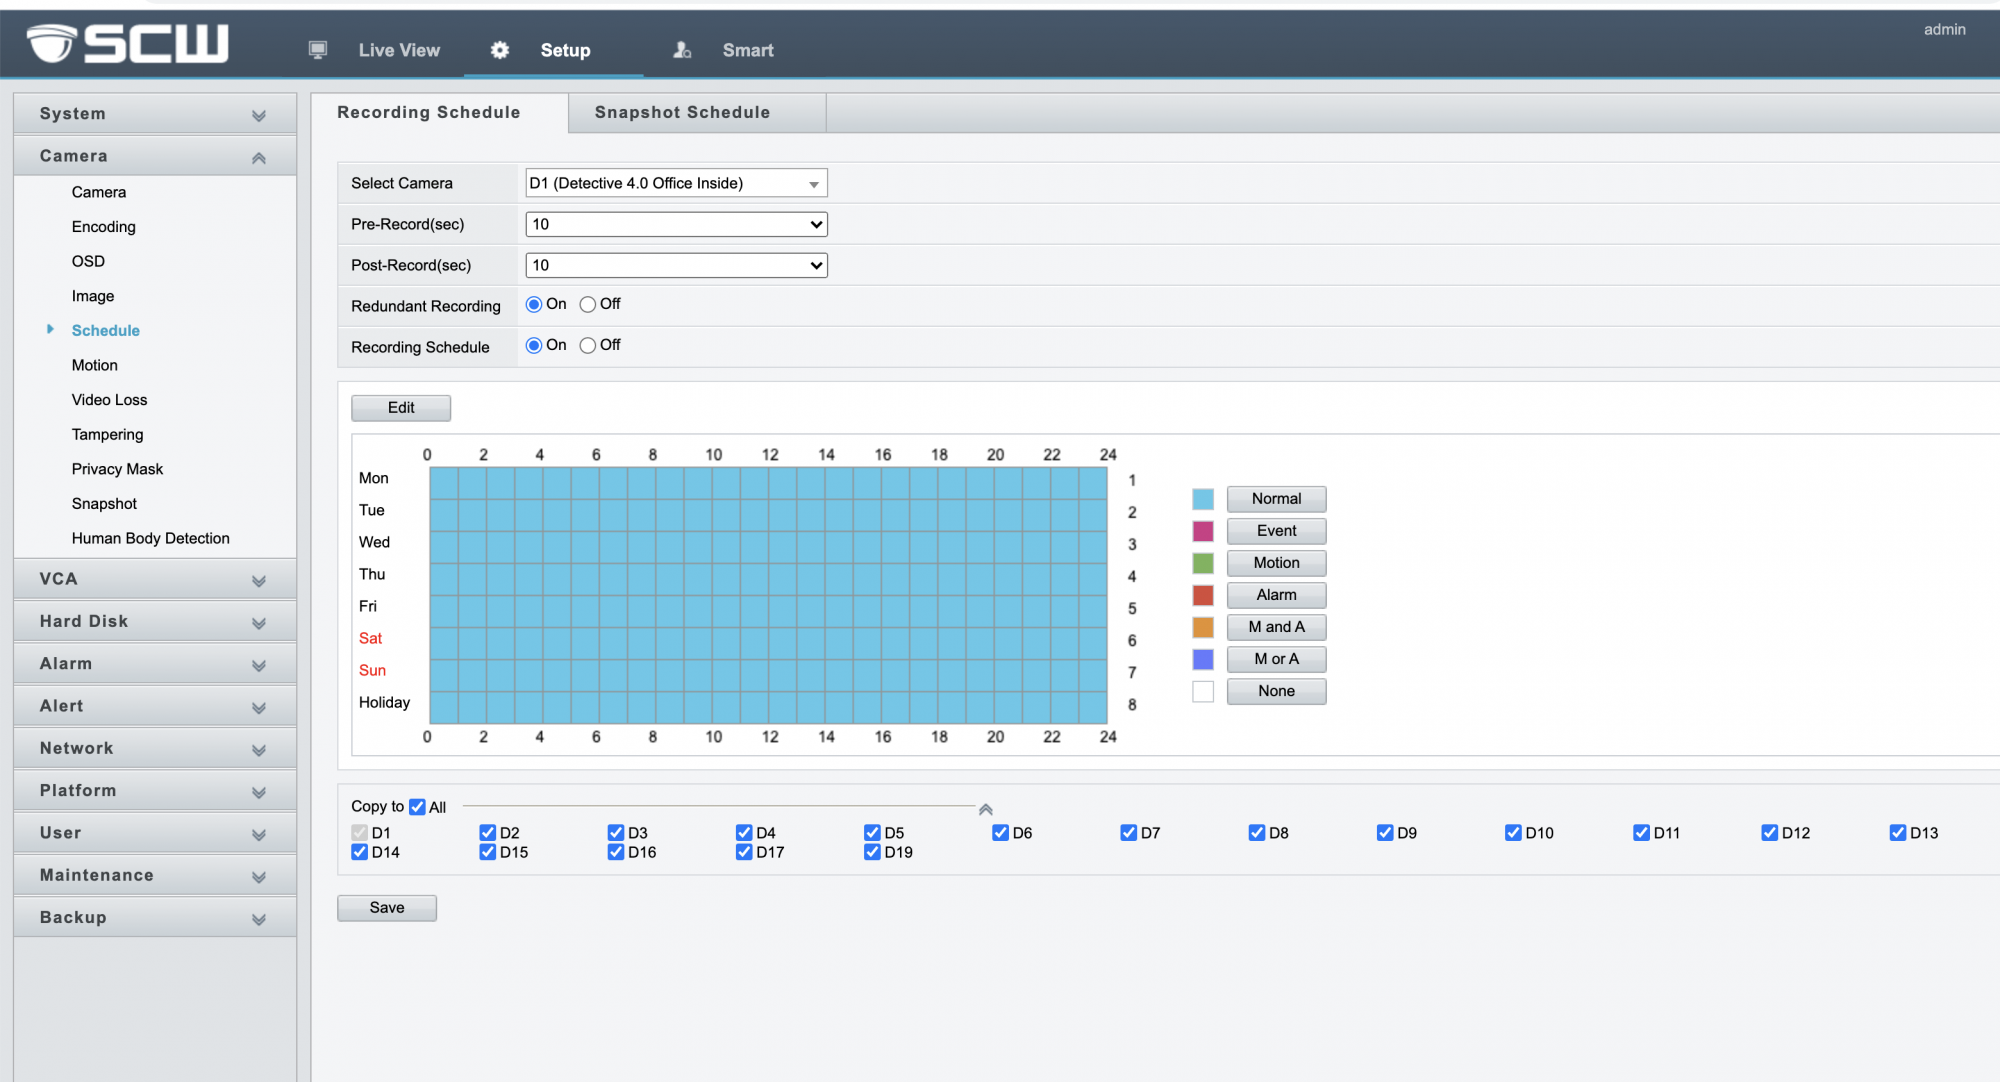
Important Note: Copying to all cameras only affects active cameras - so if you plan to add more cameras after the NAS setup, you will also need to set redundant for these new cameras.