
SCW Viewstation Mobile: tour the app, then set it up
Start with three short videos: a walkthrough of the interface, People, Vehicle & Color Search, and TraceSearch - to see what the app does on a real system.
Then follow the step-by-step guide below: download the app, create your account, add your SCW NVR, watch live and recorded video, configure alerts, share access, manage teams, and adjust supported NVR and camera settings from your mobile device.
Platform overview and key features
Three short videos covering the interface and the investigation tools that make Viewstation Mobile different. Each one opens in a full-screen player.
General UI
A walkthrough of the Home screen, layouts, live view, and playback controls. See how the app is organized before you start configuring it.
People, Vehicle & Color Search
Filter recorded footage by person, vehicle, or color instead of scrubbing a timeline. The fastest way to find an incident.
TraceSearch in VSM
Follow a person or vehicle from camera to camera across the system to reconstruct where they went and when.
Download the app and create your account
SCW Viewstation Mobile is available for iPhone/iOS and Android. On first launch, allow the requested app permissions so features such as scanning, saved media, microphone access, and notifications can work correctly.
Download SCW Viewstation Mobile
Create an account
Tap “Log In / Sign Up”
From the opening screen, select Log In / Sign Up.
Enter your email and request a code
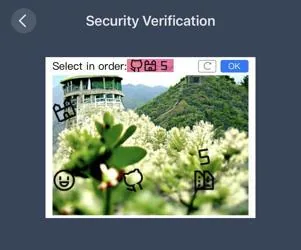
Enter your email address and tap Send Code. A mobile phone number is also supported in certain regions. Complete the security verification/CAPTCHA when prompted.
Verify and set your password
Enter the code sent to your email, create your login password, read and accept the service agreement and privacy policy, then tap Sign Up.
Add your SCW NVR
After login, Viewstation Mobile opens to the Home screen. Add the NVR by scanning its QR code, importing a saved QR-code image, or entering the device register code manually.
Tap Add Device
From the Home screen, select Add Device.
Scan the NVR QR code
Scan the QR code on the NVR device body. You can also display the QR code on the NVR’s local monitor under Network → P2P.
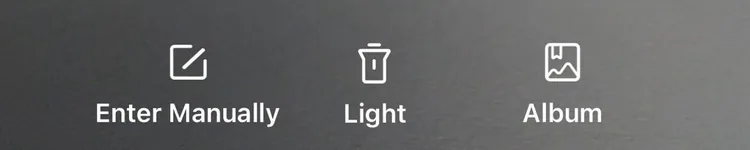
Use Album or Enter Manually when needed
Tap Album to import a photo of the QR code, or Enter Manually to enter the device register code.
Name the system and finish
Rename the system with the on-screen keyboard and tap OK. The system will appear on the Home screen. Tap Play to preview video.
Learn the Home screen
The Home screen is the default landing page. Viewstation Mobile supports Simple and Standard layouts; applications are hidden in Simple mode.
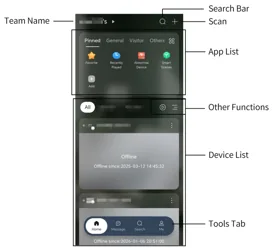
Home screen controls
- Search Bar: Search by device name, serial number, or device model.
- Team Name: Shows the active team. Tap it to add or switch teams.
- Scan: Add a device or retrieve a device password.
- App List: Displays applications supported by the current team.
- Grid / List Mode: Switch between a 2-column grid and 1-column list.
- Rearrange Devices: Drag the device control to change display order.
- Simple / Standard: Simple mode hides applications.
- Group Management: Group and manage team devices.
- Bottom toolbar: Home, Message, Search, and Me/Profile.
Use Live View and playback
Open a camera to watch live video and use the mobile controls for multi-camera viewing, image adjustment, snapshots, two-way audio, recording, and playback.
Load additional cameras into the viewing area. Select the cameras, then tap Play.
Enable or disable a wired alarm output relay on the NVR or camera to trigger a third-party device.
Adjust rotation, brightness, saturation, contrast, sharpness, 2D noise reduction, and 3D noise reduction.
Open playback in a multi-window layout. Tap the + in an empty window to add another camera.
Save a still image from the current video to Me → Album.
Enable two-way audio and use your mobile device to speak through a supported camera speaker.
Tap once to begin recording the video you are viewing and again to stop. Saved clips are available under Me → Album.
Watch: investigation tools
See the investigation workflow in action, including mobile review tools.
Configure alarm notifications
Alarm notifications can send push alerts to your mobile device. Viewstation Mobile lets you enable notifications by device and choose which detection/event types should generate alerts.
Open Message settings
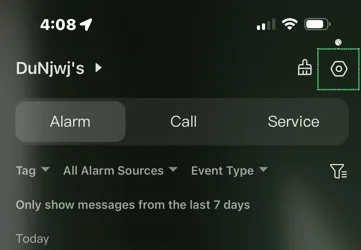
Tap Message on the bottom toolbar, then tap the Gear icon in the upper-right corner.
Allow notifications
Select Allow Notifications, then enable the slider beside the device you want to receive alerts from.
Choose Push Settings
Under the device, select Push Settings. General Detection is the default tab. Use the Intrusion tab for VCA/smart detection events and the additional options for other device events. Tap Confirm.
Review events in Messages
New events appear in the Messages area. Tap an event to preview it, then choose Playback for recorded video or Live View for current video.
Share access to your system
The Share function lets you give other users access to devices under your account. You control the permissions and how long the recipient has access.
Account sharing
- Tap the 3 dots on the device you want to share.
- Select Shared Use.
- Set Share Via to Account.
- Enter the recipient’s username or email address.
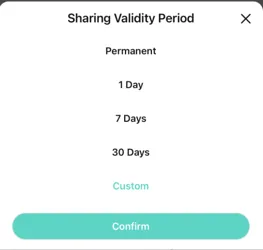
- Choose a Sharing Validity Period: Permanent, 1 Day, 7 Days, 30 Days, or Custom.
- Select My System to choose the recipient’s permissions.
- Select I have read and agree, then tap Confirm.
QR code sharing
- Open the device’s 3 dots → Shared Use.
- Set Share Via to QR Code.
- Enter a required QR Code Name.
- Set the QR Code Validity Period (how long the QR code can be scanned).
- Set the Sharing Validity Period (how long the user has access).
- Optionally configure an 8-digit Sharing Verification code.
- Select My System to choose permissions, accept the agreement, and tap Confirm.
Manage teams
Teams organize users, devices, and applications. A user can belong to multiple teams, including a default team, teams they create, and teams they are invited to join.
Create a team
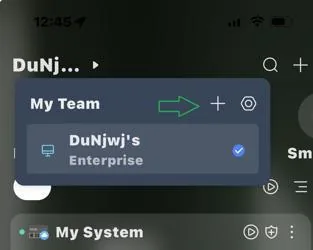
From Home, tap the Team Name in the upper-left, then tap +. You can also add a team from the Message screen by tapping the team name and selecting Add Team.
Enter team settings
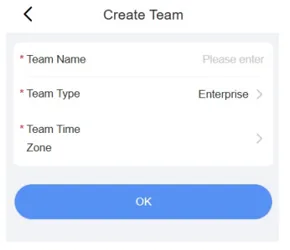
Set the Team Name, choose a Team Type, select the Time Zone, then tap OK.
Edit or switch teams
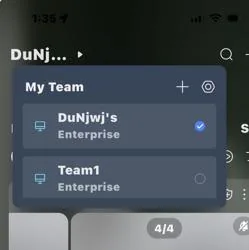
Use the Gear to rename/edit a team. The same team pages allow you to remove or leave a team. To switch, tap the Team Name and select the team you want loaded on Home.
Configure the NVR and individual cameras
Viewstation Mobile provides separate settings for the NVR and for individual camera channels. From Home, tap the device’s 3 dots → Set. Select the NVR at the top for global settings, or select a camera channel for camera-specific settings.
NVR device configuration
NVR-level controls include system information, time, sharing authorization, storage, and diagnostic tools.
- Edit the device name.
- View the firmware version and check for updates.
- Open mobile push-notification settings with Allow Alarm Notifications.
- Change the NVR password.
- Restart the NVR.
- Transfer NVR ownership to another user or team.
- Delete the NVR from your account.
The NVR settings menu also includes Disarm Alarm Linkage; the supplied support documentation does not provide additional configuration steps for that item.
Camera device configuration
Select an individual camera channel under Set to change that camera’s name, detection rules, image settings, audio, OSD, recording schedule, and PTZ settings.
Configure the camera name / primary OSD name.
Share a particular camera with a user or team.
Configure motion detection and VCA/smart features such as intrusion detection, sensitivity, and detection areas.
For available models, select active-deterrent audio.
Set Day/Night mode, WDR, and image parameters such as brightness and saturation.
Control microphone input, sound options, and gain.
Add an additional custom text field. The main camera name is controlled in Device Info.
Configure the camera’s recording schedule.
Configure PTZ presets and patrols.
Alarm Detection setup
- Enable or disable Motion Detection for the channel.
- Open Detection Area to view the camera and set a detection zone.
- Set sensitivity to Low, Medium, or High.
- Enable Snapshot to include a still image with motion events.
- Motion Detection runs 24/7 by default. Select Custom under Detection Time to set an active period.
- Use Arming Period for additional custom active periods.
SCW Viewstation Mobile FAQ
Free US-based support is included for the lifetime of your system. Our technicians are available 9 AM – 7 PM ET, Mon–Fri by chat, phone, or remote screen-share.